15 Inexpensive Ways To Craft A Cozy Mobile Home Porch
Designing a welcoming front porch for your double-wide mobile home doesn’t have to break the bank. Below are 15 porch design ideas that emphasize rustic, farmhouse-inspired coziness – think warm wood tones, string lights, and natural textures – all with total project costs under $1,000. Each idea includes a concept description, notes on DIY vs professional build, cost estimates, materials, and product examples to help you get started.
Some of the links in this post are affiliate links, which means I may earn a small commission (at no extra cost to you) if you choose to make a purchase. I only share things I genuinely love or would use in my own cozy home. Thank you for your support and helping me keep the ideas coming! 💛 Affiliate Disclosure
Simple Wooden Entry Deck with Railings

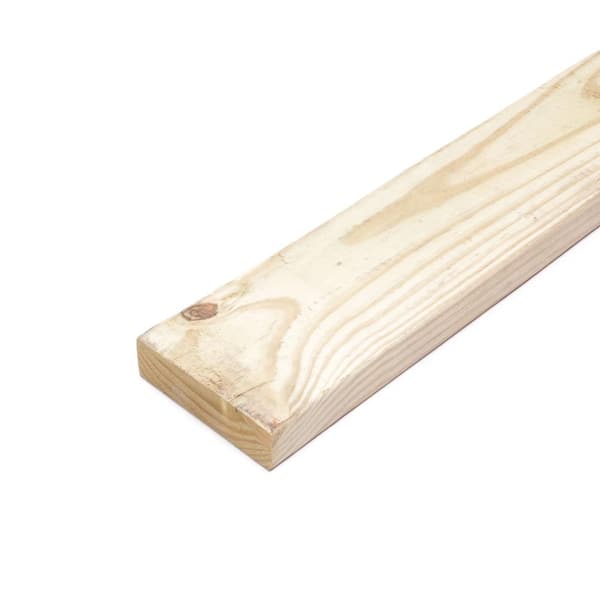
A simple pressure-treated wood front porch deck with steps and railings attached to a mobile home. Such a basic porch can be built on a budget and then made cozy with decorations like plants or seating. This design features a small platform deck (for example, 4×6 or 5×5 feet) with a couple of steps and basic railings. It provides a functional entryway and can be dressed up with potted plants, a welcome mat, and outdoor string lights for charm. The straightforward rectangular shape and pressure-treated lumber construction keep it affordable. This porch is often left open (uncovered), but you can add a fabric awning or umbrella later for shade if desired. It’s a no-frills, rustic look that can be painted or stained to match a farmhouse palette (e.g. warm oak or neutral white).
- DIY-Friendliness? Easy– this is one of the most DIY-friendly options. It’s essentially a small freestanding deck. If you have basic carpentry tools, you can build it yourself by following simple deck plans. (One homeowner built a much larger deck for under $900 by only paying for lumber, cement, and screws!) Pre-cut stair stringers and deck blocks from home improvement stores make the job easier.
- Estimated Cost to DIY: Approximately $400–$700 in materials. Costs can vary with size: for example, a pre-built 4×8 ft wooden deck with steps and rails is about $750. Even hiring a handyman for assembly should keep it near or under the $1,000 mark, given the small size.
Materials Needed:
- Pressure-treated pine or spruce lumber for framing and decking (2×6 or 5/4 boards for the floor, 2×8 or 2×6 for joists, 4×4 posts for support and railings).
- Galvanized deck screws or nails
- Concrete pier blocks or deck blocks for foundation support,
- Wood stain or sealant for longevity.
- Wooden balusters or even simple horizontal rails (2×4 lumber) can be used for the railing to stay on budget.

Upcycled Pallet Wood Porch Platform

If you’re looking for ultra-budget materials, consider building a small porch platform from upcycled pallets. Standard wood pallets (often free from warehouses or hardware stores) can be joined together to form the decking surface. This yields a rustic, reclaimed look that fits a farmhouse aesthetic. A pallet porch platform is typically low to the ground (one step up) and can be configured at your entry or even as a ground-level patio extension. Finish it with cozy touches like an outdoor rug, throw pillows on a bench, and string lights overhead for a warm, inviting vibe.
- DIY-Friendliness? Easy to Moderate– DIY is the way to go here. You’ll need to source sturdy pallets (look for heat-treated stamps, not chemically treated) and have basic tools to reinforce and level them. Pallet projects are popular because pallets are often available for free. Assembly involves connecting pallets securely and possibly adding extra boards on top for a smoother surface.
- Estimated Cost to DIY:$0 – $200. The pallets themselves can cost nothing (ask local businesses or search online classifieds for free pallets). Your expenses may just be for additional hardware and surface materials: e.g. screws, sandpaper, wood sealer, and perhaps some plywood or deck boards to cover gaps. Even if you purchase all materials, this approach can easily stay under a few hundred dollars.
Materials Needed:
- Wooden shipping pallets (in good condition)
- 2×4 lumber to frame or reinforce as needed.
- Concrete blocks or gravel can serve as a leveling base under each pallet corner.
- 3″ deck screws or lag bolts to fasten pallets together securely.
- Exterior plywood or extra deck boards on top to create a continuous floor (you can often find “project panels” or discounted lumber for this purpose).
- Outdoor wood stain or paint to unify the look and protect the wood.
@ Home Depot
Pergola-Style Porch with String Lights

Transform the front of your mobile home into a cozy outdoor room by adding a pergola-style porch. This design includes a small platform deck and a pergola frame (open rafters instead of a solid roof) extending over it. The pergola instantly gives a sense of architecture and provides a structure for hanging café lights, lanterns, or even outdoor curtains for a dreamy effect. Training some climbing plants (like ivy or wisteria) up the pergola posts can enhance the cottage garden feel, creating natural texture and dappled shade. This porch feels like an outdoor extension of your living space – perfect for a couple of chairs or a bench to enjoy warm evenings.
- DIY-Friendliness: Moderate – building a pergola requires more cutting and structural assembly than a simple platform, but it’s still quite doable for an experienced DIYer. The structure can be freestanding (four posts anchored to the deck or ground) so it doesn’t rely on the mobile home for support, which is ideal. If you prefer not to cut angles for rafters, you can buy pergola bracket kits that simplify assembly. Alternatively, hiring a carpenter for a day to help with the pergola top might be worthwhile if you’re uncomfortable with that part.
- Estimated Cost to DIY:$600 – $1,000. The cost will depend on the size and materials. An 8 ft × 8 ft pergola made of basic lumber is on the lower end of cost, especially if you do it yourself. For example, some 8×8 pergola kits (wood not always included) are advertised in the ~$800 range. By shopping for your own lumber and using standard 4×4 posts and 2x lumber for rafters, you can keep it under one grand. Keep decor (lights, plants) budget-friendly to stick to the limit.
Materials Needed:
- Wooden posts and beams – typically four 4×4 posts (pressure-treated) for the corners, 2×6 or 2×8 boards for the main beams, and 2×2 or 2×4 slats for the top lattice.
- Galvanized carriage bolts or structural screws to secure the frame. You’ll also need materials for the base deck (similar to Idea #1: joists, deck boards, etc.).
For Finishing Touches:
- Outdoor string lights (LED Edison-bulb strands ~$20–$40)
- Hanging planters
- Outdoor curtains or fabric panels (you can even use affordable canvas drop cloths for a farmhouse-look curtain). Ensure all wood is sealed or stained for weather protection.
Rustic Covered Porch with Tin Roof

A small rustic front porch with a corrugated metal tin roof, stained wood decking, and farmhouse accents (note the cozy bench, planters, and the inviting neutral colors). This kind of DIY-covered porch can be built for well under $1,000 in materials. If you love classic farmhouse porches, this idea is for you: a small covered porch featuring a lean-to or shed-style roof using corrugated metal panels (“tin” roof). The porch itself can be modest – for example, a 5×7 ft platform – with two or three wooden posts supporting a sloped metal roof that shelters the entry. The use of corrugated metal for the roof and rough-sawn or reclaimed wood for the posts/beam gives a rustic, country charm (imagine a mini barn porch). This design not only creates visual interest to the front of a double-wide, but also provides practical shelter from rain and sun. Decorate the space with a wooden bench or rocking chair, some lantern-style light fixtures, and burlap-textured pillows or throws to maximize the cozy vibe.
- DIY-Friendliness: Moderate – Adding a roof increases complexity, so you’ll need intermediate DIY skills (carpentry and careful work on a ladder). The structure must be free-standing or only lightly attached to the mobile home. Many folks do build these themselves; however, if you’re unsure about tying into the home’s fascia or ensuring the roof is secure, consider hiring a professional for the roofing portion. The footprint (floor deck) can definitely be DIY, and you might bring in a pro or handy friend for the roof framing.
- Estimated Cost to DIY:$600 – $900. A real-world example of a small covered porch project (approximately 4×5 ft with a tin roof) had a total material cost of about $675. Expect the lumber (floor and frame) to be the largest expense (~$300–$400) and the metal roofing panels to be relatively cheap (often $20 or less per panel; in that example the corrugated metal was only ~$65). Hardware, concrete footings, and paint/stain make up the rest. Even with a bit of hired labor, you should aim to stay around $1,000 or less due to the porch’s small size.
Materials Needed:
- Pressure-treated lumber for the porch floor and structure (similar to previous ideas: joists, decking boards, 4×4 support posts). For the roof: a pair of 4×4 or 6×6 posts on the front corners, a header beam (e.g. 4×6 or doubled 2×6) spanning between posts, and ledger or support attached to the home (if allowed) on the back side.
- Corrugated metal roofing sheets (commonly also called galvanized steel panels).
- 2×4 purlins or rafters to screw the metal panels onto
- Roofing screws with rubber gaskets to fasten the metal.
- Metal joist hangers
- Post anchors
- Concrete footings or piers (for the posts)
- Waterproof Wood Stain in a warm tone (rich brown, barn red, or classic white paint all fit farmhouse style).
- A vintage-style barn light or outdoor sconce can be installed by the door for added character (these can be found for ~$30 at hardware stores).
Screened-In “Bug-Free” Porch Nook

Turn a small front deck into a screened-in porch nook to enjoy the outdoors without the pests! This concept involves building a simple enclosure of screens around a small porch, effectively creating a mini sunroom or three-season room at your entry. For example, you could screen in a 6×6 ft porch by adding a framework and screening on three sides, with a screen door for access. The result is a cozy, breezy sitting area that’s perfect for summer evenings – you can have a couple of chairs or a cafe bistro set inside, accented by fairy lights or a table lamp, all while being protected from mosquitoes. Light neutral-colored curtains or shades can be added for privacy or sun control, maintaining that cozy, inviting aesthetic.
- DIY-Friendliness: Moderate – It’s quite feasible as a DIY project if you already have a porch/deck to work with. Screening-in a porch mostly requires constructing a simple frame (usually 2x4s) around the porch perimeter and stapling or clipping screen mesh to it. There are also screen porch kits that come with aluminum tracks and spline to secure the screens, which can simplify the job. If you’re building the base deck and the screen walls from scratch, it’s a bigger project but still doable for an avid DIYer. (Many homeowners have done DIY screen porches for a few hundred dollars in materials.) You might opt for a professional if you want a very polished look or if modifying the roofline is required – but for a basic screen enclosure, most can DIY.
- Estimated Cost to DIY:$500 – $1,000. Screening materials themselves are inexpensive – the main cost is the porch structure (floor, posts, etc.) which might already exist. If you start with a small deck ($400 in lumber) and add screening ($100–$200 in materials), you can come in well under $1k. Even purchasing a manufactured screen room kit can be affordable for small sizes. (One DIYer reports screening in a porch for under $500 by doing it themselves, using affordable materials.) Keep it budget-friendly by using wood framing instead of high-end aluminum systems, and by keeping the design simple (a square shape with a shed-style sloped roof or using the home’s roof overhang if possible).
Materials Needed:
- Basic porch structure (wooden deck and a roof or awning to attach screens to).
- Screening mesh – typically fiberglass or aluminum screen rolls. Fiberglass screen is user-friendly and costs only about ~$0.25–$0.50 per square foot.
- Lumber (2×4s or 2×3s) to create the screen frames or support posts.
- Screen frame kits (like Screen Tight or ScreenEze systems) are optional; they provide base strips and spline to secure screens neatly (one popular system’s base strips cost about $29 for 8 ft, and you cut the screen to fit).
- A screen door kit (often wood or aluminum) will be needed for the entrance – these are around $100 or less for standard sizes.
- Staples or spline
- Roller tool for screen installation,
- Trim (wood lattice or 1×2 strips) to cover seams and give a finished look.
Classic Farmhouse Porch

For a timeless look, design a classic farmhouse-style front porch. Even if your double-wide didn’t come with a porch, you can add a small one that evokes those country farmhouses: think white painted railings, simple spindles or pickets, and a couple of rocking chairs out front. This idea could be an uncovered deck or include a modest covering, but the focus is on the aesthetic details – crisp white or soft neutral paint on the railings, a planked wood floor (stained or painted gray/brown), and farmhouse accents like a lantern light fixture and perhaps shutters or decorative trim around the door. A 6×8 ft size porch (for example) gives enough room for seating and decor without excessive cost. Even a small overhang or portico at the door can be incorporated (with a gable pediment for that classic look) as long as the overall project stays scaled down to meet the budget.
- DIY-Friendliness: Difficult- Possible for experienced DIYers; however, achieving a polished “finished” look might require attention to detail. If you’re comfortable building a basic deck (Idea #1), you can add decorative elements like pre-turned wood balusters and newel posts available at home stores. Attaching a prefab railing kit or building your own railing is definitely DIY-able (vinyl or wood railing kits come with instructions and are meant to be homeowner-friendly). Adding a roof or fancy gable is more challenging – you might skip a full roof to stay within budget and skills, or opt for a ready-made portico kit if one exists. Overall, the straightforward deck + railing part is DIY; the rest can be as simple or complex as you choose.
- Estimated Cost to DIY:$500 – $1,000. The cost here is more about finishes than structure. A basic 6×6 or 6×8 wood porch platform will be a few hundred dollars in lumber. The railing system (if you choose vinyl or pre-fab wood) might run another couple hundred – for example, a 6-foot vinyl railing section costs around $135, and you’d need perhaps two sections plus posts. Doing it in wood could be cheaper (raw lumber) or similar (turned spindles can be a bit pricey individually). Plan for paint (exterior white paint, a gallon ~$30) or stain. If adding a small covering, factor in costs for those materials (see Idea #12). It’s realistic to keep a charming open porch at the lower end of the budget if you DIY and shop smart.
Materials Needed:treklk
- Pressure-treated lumber for the structure (again the 4×4 posts, joists, decking boards).
- Wood or vinyl railing components – for a farmhouse vibe, you might use wood 2×2 pickets/balusters and 2×4 rails, all painted white. There are also
- Pre-cut decorative railings (with fancy scrollwork or X-shaped patterns) but those can be custom; you can mimic an “X” farmhouse railing by crossing 2x4s between posts for a barn-door look.
- Gable pediment above the door, you’d use some 2x4s to create a small A-frame and cover it with either siding to match the house or tongue-and-groove boards for a rustic touch – but keep it small to save cost.
- Exterior paint
- Primer
- Brushes/rollers
- Wooden rocking chairs or a porch swing (budget permitting – sometimes you can find these secondhand or on sale; a basic wood rocker kit might be ~$100).
- Lag screws or structural screws for connecting beams
- Post anchors if your posts will sit on the deck surface.
Cozy Corner Porch with Built-in Bench Seating

Make the most of a small porch footprint by designing a corner porch that includes built-in bench seating. In this idea, your porch might wrap around one corner of the mobile home (for instance, a 4 ft x 8 ft L-shape that covers the front door area and one side). Instead of standard railings on all sides, one or two sides feature a custom bench seat built into the railing structure. This bench can be piled with outdoor cushions and throws to create a warm, inviting nook – perfect for sipping coffee in the morning. The corner layout adds architectural interest to the mobile home, breaking up the rectangular lines and providing an opportunity for a partial wrap-around porch feel on a budget. Finish the scene with string lights along the top rail or an overhead trellis, and add some textured throw pillows in neutral tones for that cozy vibe.
- DIY-Friendliness: Moderate. Yes, with some carpentry know-how – building a bench into a porch railing is a common DIY upgrade for decks. You will be constructing a basic deck and then adding horizontal seat boards and supports. There are many DIY tutorials for built-in deck benches. Because this porch attaches around a corner of the home, you must ensure it’s freestanding (not relying on home structure) – typically achieved with posts at the outer corners and where the porch turns the corner. If you keep the design simple (straight bench with a back that doubles as railing), it’s very achievable as a DIY. A professional could do it quickly too, but likely isn’t necessary for such a small project.
- Estimated Cost to DIY:$600 – $900. The corner/wrap-around shape means a bit more lumber for framing two perpendicular sections, but the size is still small. Lumber and decking might be in the $400-500 range. The built-in bench doesn’t add too much cost – mainly a few extra 2×4 joists and deck boards for the seat and back. If you use high-end finishings or lots of decorative elements, costs approach the upper end. However, staying with basic treated lumber and DIY labor should keep this easily under $1k. (For reference, custom benches on decks are typically inexpensive add-ons since they use leftover decking material.)
Materials Needed:
- Lumber as per a small deck: posts, joists, decking boards. Since this is an L-shaped porch, you’ll have a 90-degree corner to frame – you may use a 4×4 post at the corner for stability. The built-in bench can be constructed using 2×4 or 2×6 framing anchored to the porch railing or posts, with decking boards (e.g. 2×6) as the seat surface. Ensure the bench is about 18” high and 15–18” deep for comfort. The bench back can be the porch railing itself if built at bench-height (double duty), or you can create a separate backrest panel using additional boards.
- Galvanized lag screws or brackets to support the bench structure securely.
- Outdoor seat cushions or foam pads covered in weather-resistant fabric (you can DIY covers from drop cloth or buy pre-made cushions).
- Sturdy railing on any open sides not occupied by the bench, for safety.
- Pergola top or trellis on one end of the bench to hang lights orcurtains (this could be as simple as two posts with a header beam over the bench).
Log Cabin-Style Porch

Give your mobile home a touch of log-cabin charm with a log or timber-style front porch. This design emphasizes natural wood in a chunky, rustic form: for example, use round log posts or half-log railings instead of standard lumber. A small porch (say 5×5 or 6×6) can be outfitted with landscape timbers or peeled logs as the railing and support elements to resemble a cabin. Even if you don’t have actual logs, you can simulate the look by using round cedar posts or posts wrapped in log-looking veneer. The floor can be regular deck boards but stained in a cedar tone. Add a couple of rustic touches like a wood slab side table, a lantern, and a welcome sign made of reclaimed wood, and you have a cozy cabin vibe at your front door. Soft outdoor lighting (perhaps wall-mounted lanterns) and a natural fiber door mat (like jute or coir) will enhance the warm, woodsy atmosphere.
- DIY-Friendliness: Moderate– The construction method is similar to a basic wood porch, so that part is DIY. Sourcing and working with “log” materials can be a bit tricky, as logs are heavier and sometimes harder to connect. However, there are DIY-friendly products like landscape logs (rounded on two sides, flat on two sides) that can be used as railing components, and these can be screwed together like dimensional lumber. If you use pre-milled log cabin porch parts (some companies sell log home porch railing sections), they often come with tenon and mortise joints that require fitting. It’s doable if you’re handy and patient. Alternatively, a carpenter or log home company could supply the parts cut to size, and you assemble. The porch structure itself should be freestanding and similar to any deck – so any builder familiar with decks could handle it.
- Estimated Cost to DIY:$700 – $1,000. Using specialty wood like cedar or real logs can raise costs a bit compared to pine lumber. But because our porch is small, you can still keep it under $1k. For example, landscape timbers (often pine treated logs, 3–4” diameter) are quite inexpensive per piece (around $5–$10 each) and could be used for railing sections. A couple of larger round posts (maybe 6” diameter, 8 ft long) might be $50–$100 each if store-bought. Standard decking for the floor remains cost-effective. If you have access to actual logs or reclaimed timber, costs could drop significantly (just ensure they’re properly dried and treated for insects).
Materials Needed:
- Log or log-style wood pieces for the accents: options include cedar logs, treated landscape timbers, or even round fence posts. For example, four 4×4 (or round pole) posts can support the porch. Use log slices or matching wood for the steps (a fun idea: cut thick log rounds to use as stepping “stones” leading up if the height is low, or build normal steps but clad the sides in log slabs). The floor structure can be regular lumber (2×6 joists, etc.) but you might choose 2×6 cedar decking for the surface to get a nicer grain and rot resistance (cedar costs more than pine, but for a small area it might be worth it).
- Railing parts: you can create a simple log railing by running two horizontal logs (or peeled poles) between posts, one at chair height and one near the floor, and infill with vertical log spindles or even crossed diagonal logs.
- Lag screws or timber screws to secure lag logs.
- Countersink and plug holes for a cleaner look
- Seal or stain all the wood with a clear outdoor sealer or a light honey-colored stain to bring out the grain and protect it.
Partial Wrap-Around Veranda

One hallmark of classic country homes is the wrap-around porch, which exudes charm and offers multiple viewpoints. While a full wrap-around might be too costly, you can recreate the look on a smaller scale by building a partial wrap-around porch on your double-wide. For example, extend a front porch across the door and around one side of the home for a few feet, creating an L-shaped porch. This could mean a front section maybe 8 feet long by 4 feet deep, then wrapping 4 feet around the side for a small side landing. The result is a cozy veranda effect that significantly boosts curb appeal (wrap-around designs are known to “instantly create a charming look and superb level of curb appeal”). Style it with the appropriate farmhouse touches: a plank floor, white railing, perhaps a few turned posts or chamfered column details at the corner, and a metal roof or awning covering the front section if desired. Decorate the corner with a hanging swing or a pair of chairs, and add flower boxes along the railings for a pop of natural color.
- DIY-Friendliness: Difficult. This pushes the complexity up a notch due to the wrap-around shape. It’s still a wooden porch at heart, but you’ll be integrating it along two sides of the home and possibly integrating an outside corner (which requires careful bracing and leveling). A competent DIYer can tackle it – essentially you build two small deck platforms and join them. If adding a roof over any part, that might require professional help (especially to do a corner hip or gable). Many people do DIY their wrap-around porch additions, but if you’re at all unsure, you could do the platform yourself and hire out any roof or tricky railing details. The design will also need to account for supporting itself independently of the home (as with all mobile home porches).
- Estimated Cost to DIY:$800 – $1,000. We are increasing the length of porch, so more lumber = more cost. However, by keeping the depth shallow (4 feet on side, maybe 6 feet in front) and not extending too far, we contain the budget. Most of your cost is standard lumber and railing materials, which scale with length. To estimate: if a straight 8×4 porch costs maybe $600, adding a 4×4 side section and an extra corner post might put you in the ~$800 range. Including even a partial cover (like an awning on the front) and nicer trim could push it near $1,000. It’s important to design within a footprint that stays manageable. Also consider that more porch means more paint/stain, more hardware, etc., which incrementally adds cost. But the visual payoff is high for the cost.
Materials Needed:
- Pressure-treated wood for an L-shaped deck (use strong ledgering between the front and side sections or tie them together with angle brackets). At the outside corner where the porch turns, set a sturdy 4×4 or 6×6 post; this will carry any future roof load if needed and is a key structural support. Standard decking boards for floor.
- Railings: go classic – could be vertical pickets or an “X” pattern farmhouse railing for extra flair. If you plan to eventually screen or cover one section, consider framing that section slightly differently (for instance, taller posts that could support a future roof). But within the $1k budget, likely it’s just an open porch.
- L-brackets and cross-bracing under the framing, especially at the corner, to prevent wobble (wrap-around shapes need to resist racking).
- Decorative trim such as skirting around the bottom (lattice panels or vertical slats to hide the piers)
- Gingerbread trim or brackets at the top of posts for Victorian farmhouse charm (these can be cut from plywood or bought as small accents cheaply).
- Paint the whole structure a unifying color – white or cream for railings/trim, and a gray or natural stain for the floor, to align with a soft, neutral farmhouse palette.
Porch with Integrated Planter Boxes

Combine form and function by building a porch that incorporates planter boxes into its design. In this idea, the railings or the sides of the steps double as planters for flowers or herbs, bringing natural texture and color right into the porch structure. For example, instead of traditional railings on the front of a small porch, you could have a long raised planter box made of the same wood, about rail height, overflowing with petunias, ferns, or succulents. Planters can also be placed flanking the stairs as entry features. The wood of the planters, stained or painted, blends with the porch, maintaining a cohesive look. This approach saves you money on separate landscaping and decor – the planters are the decor and railing in one. It creates a cozy garden porch atmosphere, especially when filled with greenery, and fits well with farmhouse aesthetics (think rustic wooden planters, maybe with a whitewash finish or left natural). Soft string lights or solar fairy lights can be woven through trellis stakes in the planters at night for a magical glow.
- DIY-Friendliness: Easy to Medium – building basic planter boxes is straightforward and can even be done with leftover decking lumber. You’re essentially building some bottomless wooden boxes that attach to the porch frame. If you can build a deck, you can build a rectangular planter. This design can actually simplify railings (straight sections of planters are easier than complex railing designs). Just ensure proper lining and drainage for the planters so your wood porch isn’t compromised by moisture. Overall, a great DIY project that adds a custom touch without requiring special skills beyond wood cutting and screwing together boards.
- Estimated Cost to DIY:$500 – $800. The porch itself is standard cost (depending on size, say ~$500 for wood). The planters add some extra lumber (maybe another $50–$100 in wood for a couple of good-sized planters) plus soil and plants. Even with plenty of plants and soil (which can add up if you buy many; but we’re talking maybe on the order of $100 for soil and flowers for multiple planters), you should be safely under $1k. To save money, you can fill the bottoms of deep planters with filler material (rocks, bottles, etc.) so you don’t need as much potting soil. If you already have containers or pots, you might build the porch with spaces to drop those in rather than full built-ins, as another cost-saving variation.
Materials Needed:
- Pressure-treated lumber for porch framing and planter box construction. For planter boxes, cedar is excellent (naturally rot-resistant), but treated pine can work if you line the inside (since treatment chemicals shouldn’t directly touch soil for edibles; if just flowers, it’s fine once wood is dried out). Use 2×8 or 2×10 boards to create nice deep planters on the perimeter of the porch, or build smaller box planters ~12” wide that act as railing sections.
- Landscaping fabric or plastic liner to line the inside of wooden planters and protect the wood (staple it inside, and poke a few drain holes).
- Drainage – e.g., a layer of gravel at the bottom of the planter and holes at the bottom/side for water to escape. Standard deck screws to assemble. For the porch floor and remaining railing sections: standard deck boards and 4×4 posts (you might put a post at the ends of a planter for stability).
- Stain or paint that’s plant-friendly on the outside; inside doesn’t need finishing due to liner.
- Potting mix and your choice of plants. To keep with a neutral palette, you might choose all green plants (ferns, ivy) or white flowers (like white impatiens or petunias) for a farmhouse look.
- Terracotta pots can also sit in the planters for that classic touch.
Pre-Fabricated or Modular Deck Kit

If you want to save time and potentially money, consider using a pre-fabricated deck or porch kit designed for mobile homes. These kits come with pre-cut lumber and hardware – some are even partially assembled sections – that you can install yourself or with minimal labor. Common sizes for such kits include 4×4, 4×6, 4×8, or 6×8 feet, often with a set of steps and railing components included. The idea is to have a ready-made porch delivered or picked up, which you then anchor in place at your front door. This approach ensures the design is sound and up to code (if it’s a reputable kit) and can drastically reduce the construction hassle. A modular kit porch might look somewhat plain out of the box, but you can easily customize the finish – paint or stain it, add decorative post caps, hang some flower baskets – to give it that cozy, personalized farmhouse character.
- DIY-Friendly? Easy – these kits are intended for ease of assembly. If you can use a drill and a level, you can put together a modular porch kit. Many come with pre-drilled holes and all the necessary nuts and bolts. In some cases, the kit might be heavy to maneuver (a prebuilt 5×5 deck section, for instance), so having a friend to help is good. But overall, the skill required is lower than building from raw lumber because the cuts and design are already done for you. If you really don’t want to DIY at all, you could hire a handyman to install a kit; since it’s quick work, labor costs would be relatively low.
- Estimated Cost to DIY:$350 – $1,000. Kits vary in price depending on size and material. Basic wooden deck kits (with untreated or basic treated lumber) can be very affordable – one source advertises an 8 ft x 8 ft porch kit with steps and railings for only ~$349 (that likely doesn’t include delivery, and assumes you assemble). Larger or premium kits (e.g., with composite decking or vinyl rails) will cost more – for example, a pre-fab 6×8 with rails might be around $900. The Oakley Portable Buildings catalog lists a 6×8 pre-built porch at $995 including 4 steps and handrails (that’s delivered assembled within a local area). So, plenty of options under $1k. Do compare what’s included: some kits come with wood only and you provide screws, others are all-inclusive.
Materials Needed:
- Pressure-treated pine lumber is the material for these kits (sometimes options for composite or cedar upgrades). The kit will include the porch floor structure (joists, boards), 4×4 posts, railing components, and often a set of pre-cut stair stringers and treads. Hardware like bolts, screws, and brackets should be in the package, along with instructions. You may need to provide
- Concrete pavers or footings to set it on, and any anchoring hardware to attach it to the home or ground (check kit details – some expect you to lag it into the mobile home rim joist, others are free-standing).
- Post anchors or straps to secure it,
- Finish (paint or stain)
- Skirting to hide the underneath.
Gabled Entry Portico

For a truly polished look that screams cozy cottage, build a gabled entry portico over a small front porch. This is essentially a petite pitched roof covering just the doorway area, supported by two posts, forming a charming A-frame shape that ties into the home. Underneath this roof, you have a small porch landing (maybe 4×5 ft – just enough for the door swing and a person or two). The gable roof can be finished with shingles or metal to match the home’s roof, and even include decorative elements like a truss detail or scalloped trim in the peak. This design turns a plain mobile home front into an inviting focal point, giving the sense of a farmhouse front stoop you’d find on a site-built home. Paint the posts and trim in a soft white or cream, use a tongue-and-groove wood soffit for the porch ceiling (stained in a warm tone), and you have a high-end look on a small scale. Because this covers only a limited area, you keep materials and costs low while adding a lot of character.
- DIY-Friendliness: Hard- This is one of the more complex ideas due to the roof framing. Building a small gable roof involves cutting rafters or using gable truss kits and working at height. It can be done by a skilled DIYer – especially if you find plans for a simple portico. However, many people opt to hire a carpenter for the roof portion to ensure it’s structurally sound and properly integrated with the mobile home (flashing where it meets the home, etc.). The porch landing itself (the small deck) is straightforward DIY. So you might do the bottom, and get help for the top. If you’re confident with geometry and cutting angles, it’s certainly possible to DIY the whole thing with some research (plenty of guides for building your own portico roof).
- Estimated Cost to DIY:$800 – $1,000. The extra cost here comes from the roofing materials and possibly hiring labor for the tricky parts. Lumber for a 4×5 or 4×6 landing and two posts is maybe $200. The gable roof structure (rafters, ridge board, sheathing) plus shingles or metal might add another $200–$300 in materials. Add some for trim (fascia, soffit, column wraps) and hardware. If you do it all DIY, you could come in under $800. If you pay a contractor a small job fee to help with the roof, that could put you closer to the top of the budget range. Still, you’re getting a “high-impact” architectural feature for the price. Remember, even a small porch roof can greatly increase curb appeal and perceived value of the home, so it’s a worthy investment.
Materials Needed:
- Pressure-treated joists and decking as usual
- 4×4 or 6×6 treated posts; many like to wrap these in a nicer material (e.g., build a box around a 4×4 with PVC or pine boards to make a square column of, say, 6×6 size).
- 2×4 or 2×6 rafters (for the roof), a ridge board, and either OSB or plywood sheathing topped with shingles to match your roof, or purlins with a metal roofing panel if you go that route. Because it’s a small gable, you might choose metal roofing (just two small triangle pieces) for ease and a farmhouse vibe, or use leftover shingles for continuity.
- Plywood and trim, or open with a decorative truss.
- Flashing where the new roof meets the mobile home’s wall to prevent leaks.
- Simpson connectors or similar to tie the rafters down to the header beam over the posts, and to the ledger attached to the home (though generally the porch roof should be free-standing with just flashing to the home).
- PVC or wood trim boards for fascia and gable ends
- Soffit panels (or beadboard panel) for under the porch roof for a finished look.
- Paint or stain – often people do white for the trim and posts, and a natural wood stain for any ceiling panel for contrast.
Modern Farmhouse Porch (Wood + Black Metal Accents)

Marry rustic and contemporary design with a modern farmhouse-style porch. This concept keeps the warmth of wood but introduces black metal accents for a clean, updated look. Picture a small front deck with rich brown stained floorboards and black iron railings or cable rail instead of traditional wood spindles. The posts could be wrapped or painted black, or left natural with black bracket hardware visible. You might use sleek black metal post caps and hang a black metal pendant light or wall sconce. The color palette is neutral and crisp: natural wood, black, and maybe white or gray for the mobile home siding/backdrop. Despite the modern touches, you can still make it cozy – add a couple of matte black planters with greenery, a jute rug, and some Edison bulb string lights. The result is a porch that feels trendy yet inviting, perfect for those who love the Joanna Gaines-style modern farmhouse vibe.
- DIY-Friendliness: Easy to Moderate – structurally, it’s the same as a basic porch. The difference is mostly in the materials/finishes chosen. If you are comfortable building a wood deck (or using a kit as in Idea #11), you can then swap standard wood railing for metal components. Many off-the-shelf metal railing systems are DIY-friendly (they screw together like an Erector set, or you drill baluster holes and insert metal balusters). Cable railing kits also exist that a DIYer can install with some patience. Alternatively, you can build the porch frame and have a welder or metalworker make a simple iron railing – but that might exceed budget unless you find a good deal. There’s also a popular DIY approach of using steel conduit or rebar as balusters, which is affordable and gives that black iron look. So plenty of DIY avenues to achieve this style.
- Estimated Cost to DIY:$600 – $1,000. The metal elements can raise cost a tad compared to all-wood, but since the porch is small, it’s manageable. For instance, a pack of 50 black aluminum balusters might cost ~$150, which is enough for a couple of sections of railing. Cable railing kits could be around $1-$3 per foot of cable plus hardware – on a small porch, not too expensive. If you went with premade iron panels or something, those could be $100+ each section. The wood portion (deck boards, framing) is standard cost ($400-ish). So depending on choices, you might be nearer $1,000 when all done, but definitely possible within budget. Also, using mixed materials means you might spend less on wood in some areas (e.g., fewer wood balusters) and can redirect that budget to the metal parts.
Materials Needed:
- Wood for framing and floor – pressure-treated or you might choose a nicer wood for the top surface like cedar or even composite if budget allowed for a very small area. However, composite usually would blow the budget, so likely stick to wood and just stain it a rich tone.
- Metal for railings: options include black aluminum balusters (often 3/4” square, come in packs)
- Wrought iron-look panels, or DIY using electrical conduit pipes or rebar painted black. If doing cable, you’d need a kit with stainless steel cables and tensioners, plus wood or metal posts to run them through.
- Black metal brackets – for example, use black joist hangers or spray-paint your hardware black so it intentionally shows as a design feature.
- Blackened steel pipes for railing posts or even as supports for a small awning.
- Semi-transparent wood stain in a warm gray or brown for the floor and maybe leave the wood posts that color, then contrast with
- Matte black paint on any metal or wood parts you want to be black (there are outdoor metal paints and also you can use matte black spray paint on things like balusters or brackets).
Fabric Awning or Shade Sail Porch

Not every cozy porch needs a solid roof – a fabric awning or shade sail can provide comfort and style on a budget. In this idea, you create a pleasant front porch by adding a retractable awning or a fixed canvas canopy over a small deck or stoop. The awning offers shade and a sense of enclosure, using fabric which introduces a soft texture and can be in a neutral tan, gray, or cream to match a farmhouse palette. Retractable awnings (manual ones) are affordable and can be mounted above the door, extending out to cover the porch when needed. Alternatively, a shade sail (a tensioned triangular or rectangle fabric panel) can be attached to posts at the porch corners and the side of the home, creating a modern yet warm-looking canopy. Underneath, furnish the porch with some comfy chairs or an outdoor loveseat with cushions in coordinating colors. String lights can be hung around the awning frame or along the edges of the sail for evening ambiance. Potted plants and maybe an outdoor area rug will complete the cozy, relaxed feel. This approach is great if you live in a sunny area and want quick shade without building a full roof.
- DIY-Friendliness: Moderate – Installing a manual retractable awning is typically a doable DIY job (it involves anchoring a ledger bar to the home’s exterior and bolting the awning on). Shade sails are also quite DIY-friendly: you’ll need to set a couple of posts and use eye-bolts to tension the fabric; just follow instructions for proper angle and tautness. No advanced carpentry is needed, but you should be comfortable with using a drill and ladder for mounting hardware. If your porch doesn’t exist yet, you’d also build the simple porch platform (as in Idea #1 or via a kit) to have something to shade. But assuming you have a deck or stoop, adding the shade element is a quick upgrade. Professionals can install these as well, but for a small unit it might not be worth the extra cost.
- Estimated Cost to DIY:$150 – $600. The cost of shade solutions has a wide range based on size and type. A small manual retractable awning (~8×10 ft) can be found for as low as $150-$200 online. Higher-end models or larger sizes will be a few hundred. A shade sail (say a 12×12 ft triangle) might cost $50-$100 for the fabric and then you’ll spend on posts and hardware (maybe $100 more). So the shading part can be very cheap. The rest of the porch (floor, seating, etc.) might already exist or be minimal. Even if you factor in building a small 4×6 platform (~$300) and then $200 for an awning, you’re around $500 total. As long as you don’t opt for motorized awnings or custom canopies, this stays well within budget.
Materials Needed:
- Retractable awning (if desired),you’ll receive the assembled awning unit (usually aluminum frame with acrylic fabric)
- Mounting brackets
- Screws/bolts for your siding type (mount to studs or blocking behind the siding).
If doing a shade sail:
- Sail fabric (typically heavy duty weather-resistant cloth with D-ring corners)
- Sturdy anchor points: either existing structure or 4×4 (or metal) posts installed at proper locations.
- Eye bolts, turnbuckles, and carabiners to tension the sail tight.
- Concrete for posts if freestanding (to withstand wind pull).
- UV-resistant curtains that you can hang on a side for a cabana vibe (using a wire or rod between posts)
- Outdoor rug (natural jute-look or braided styles give farmhouse charm; you can find these for $50 or less in smaller sizes)
- Lighting – rope lights or string lights can be threaded along the edge of the awning or around the posts.
Garden Trellis Porch Accent (Green & Cozy)

Enhance your porch with garden trellis accents, turning it into a little green oasis. This idea involves adding vertical or overhead trellises to a basic porch structure so that climbing plants and vines can grow and envelop the space. For instance, you could install a wood lattice panel on one side of the porch (maybe the side that gets a lot of sun or faces the street) and plant a climbing rose or clematis at its base – soon you’ll have a wall of greenery and flowers that also provides privacy. Alternatively, create a pergola-top trellis by adding a few lattice or grid panels overhead (or even crisscross strings or wires) and train vines like jasmine or morning glory to climb up the posts and across the top. The effect is an intimate, cottage-like porch that feels connected to the garden. Even in cooler months or if you use fake vines or fairy lights on the trellis, it adds a charming texture. Combine this with comfortable seating, maybe a porch swing, and soft neutral cushions, and you have a storybook-cozy front porch.
- DIY-Friendliness? Very Easy – adding a trellis is very easy DIY. Lattice panels can be cut to size and nailed or screwed to the side of a porch or between porch posts. You can also build a simple frame with 1×2 strips to hold a lattice if you want it freestanding. If doing an overhead trellis, you might need to attach some cross pieces or a light pergola structure, which is a bit more work but still doable for a DIYer (similar skills to building a fence or assembling a kit). If you don’t have a green thumb, even hanging fake ivy garlands or using weatherproof privacy screen roll can simulate the effect with zero maintenance – that’s as simple as stapling it on. This idea is more of an add-on than a full porch build, so it’s a great DIY project to beautify an existing porch or one from the above ideas.
- Estimated Cost to DIY:$100 – $300 (in addition to a base porch). The trellis materials themselves are inexpensive. A 4×8 ft pressure-treated wood lattice panel is roughly $35 at Home Depot (price can vary a bit) and one or two panels might suffice. A couple of 2x4s to frame or support them, plus screws, maybe another $20. Plants can be bought for under $20 each (smaller vines $10, larger potted climbers $30+ if you want instant impact). If you go heavy on plants, soil, planters, etc., it could increase cost, but since the question is more about the porch structure, we’ll count the trellis part. Even adding an arbor arch (a pre-made wooden arbor kit for the entry) can be found in the $100-$150 range. So you can certainly green up your porch well within a few hundred dollars.
Bring natural privacy to life with fast-growing arborvitae or jasmine vines – shop climate-friendly picks now.
Materials Needed:
- Lattice or Trellis panels – could be the classic diagonal wood lattice, more modern square lattice, or even DIY a grid of wires or ropes. For a rustic look, you might use livestock wire panels or build a crisscross of wooden strips.
- Posts or supports: if attaching to an existing porch, you can fasten lattice to the side of a post or add a small frame. For standalone trellis sections, use 2×2 or 4×4 posts to hold them up (sink the posts or bolt to porch).
- Climbing plants: choose perennials like clematis, climbing roses, or honeysuckle for flowers; ivy or Virginia creeper for greenery; or even vegetables like pole beans if you fancy a mini edible garden.
- Planter boxes or soil space – you can integrate planters as in Idea #10 or set large pots at the base of the trellis.
- Fasteners: U-shaped vine eyes or wire clips if you string wire, heavy-duty staples or screws with washers to attach lattice.
- 2×4 cross pieces to act as mini rafters that you staple netting or wire mesh onto for vines to hang down.
Budget estimates and material examples are drawn from real DIY porch projects and product listings. For instance, pre-fabricated porch kits for mobile homes can cost as little as $349 for an 8×8 with steps, and a DIY enthusiast reported building a full deck for under $900 just by buying lumber, cement, and screws. A small DIY covered porch (with a metal roof) was completed for about $675 in materials. Pressure-treated lumber remains one of the most cost-effective materials, and simple designs help keep labor costs down. Adding design touches like wrap-around elements increases curb appeal without huge expense if kept small. Many of the decorative elements (string lights, railings, awnings, etc.) are available at major retailers in the prices mentioned, making these ideas practical and accessible. Each idea above balances cozy farmhouse aesthetics with cost-effective building practices, perfect for upgrading a double-wide mobile home’s facade on a budget.
Enjoy crafting your welcoming new porch!