27 Amazing & Inexpensive DIY Spring Wreaths
Literally Anyone Can Make These!
Spring is upon us, and as nature begins to bloom, it feels fitting to mirror that vitality within our cozy living spaces. Embrace the arrival of this soft, lovely season by crafting stunning DIY wreaths with intent. Embarking on a wreath-making journey can be rewarding, with results that are both visually appealing and cost-effective. Here’s a detailed look into 27 cozy DIY spring wreath projects that cater to every taste.
Creating your spring wreaths is undoubtedly satisfying and offers a creative way to personalize your décor. These wreaths, typically adorned with vibrant florals and rustic elements, can effortlessly enhance the entrance to your home, welcoming guests with their refreshing charm. Whether you prefer the simplicity of a lush greenery wreath or the elegance of an orchid-adorned one, there’s something for everyone.
Fun fact: My first job as a teenager was at Michaels. I worked there for about 5 years before I left retail completely. Originally I was just a seasonal associate, but I quickly worked my way up and was a supervisor by the time I left. But during that time, I would assist with the Floral Design Specialist (unfortunately I don’t think they have those anymore) in making faux arrangements and wreaths. Spring time would always excite me because it was a stark contrast from all the glitter and fake snow that comes with Christmas florals. Spring wreaths often bring a sense of freshness and cozy, with the pretty pinks, blues, and purples. With my expertise, I’m going to show you 27 cost effective wreaths that literally anyone can make..so you can go on with your cozy, intentional, quality lifestyle.
Today, as a homesteading, grandmillennial-vibing mom, I continue to craft faux wreaths as a hobbyist. After my Etsy shop success, I’ve embraced the fun and open creativity that comes with crafting just for pleasure.
Some of my reviews:
“Just as pictured!”
-Carli V.
“This wreath is so beautiful. Exactly as shown. Placed it on my mom’s door in her residential care room. Adds cheer for all that pass by.”
-Jeannie D.
- Romantic Heart Shaped Wreath with Baby's Breath
- Evergreen Eucalyptus Wreath
- Orchid Wreath with English Ivy
- Monogram Eucalyptus Wreath with White Flowers
- Cheery Citrus Wreath
- Vintage-Inspired Lace and Rose Wreath
- Succulent & Lavender Hoop Wreath
- Fresh (Appearing) Herb Wreath
- Rustic Lavender Wreath with White Flowers
- Charming Garden-Themed Wreath
- Purple and Blue Hydrangea Wreath
- Woodland Cottagecore Wreath
- Cutesy Birds Nest Wreath
- Pastel Dainty Floral Wreath
- Rustic Daffodil Grapevine Wreath
- Cheery Tulip Wreath
- Boho-Inspired Macrame Pampas Wreath
- Farmhouse Asymmetrical Wreath With Burlap Bow
- Colorful Easter Egg Wreath
- Pink Peony and Eucalyptus Wreath
- Nautical Wreath with Seashells
- Cheery Daffodil and English Ivy Wreath
- Charming Felt Wreath with Bow
- Elegant Muted Wreath with Roses & Lace
- Minimalist Dogwood Wreath with Ferns
- Farmhouse Wreath with Muted Florals
- Charming Butterfly Wreath Using Cardstock
Some of the links in this post are affiliate links, which means I may earn a small commission (at no extra cost to you) if you choose to make a purchase. I only share things I genuinely love or would use in my own cozy home. Thank you for your support and helping me keep the ideas coming! 💛 Affiliate Disclosure
Before you decide on what type of wreath you want to create, you should invest in some quality wreath making supplies. Here are some that I recommend and personally use:
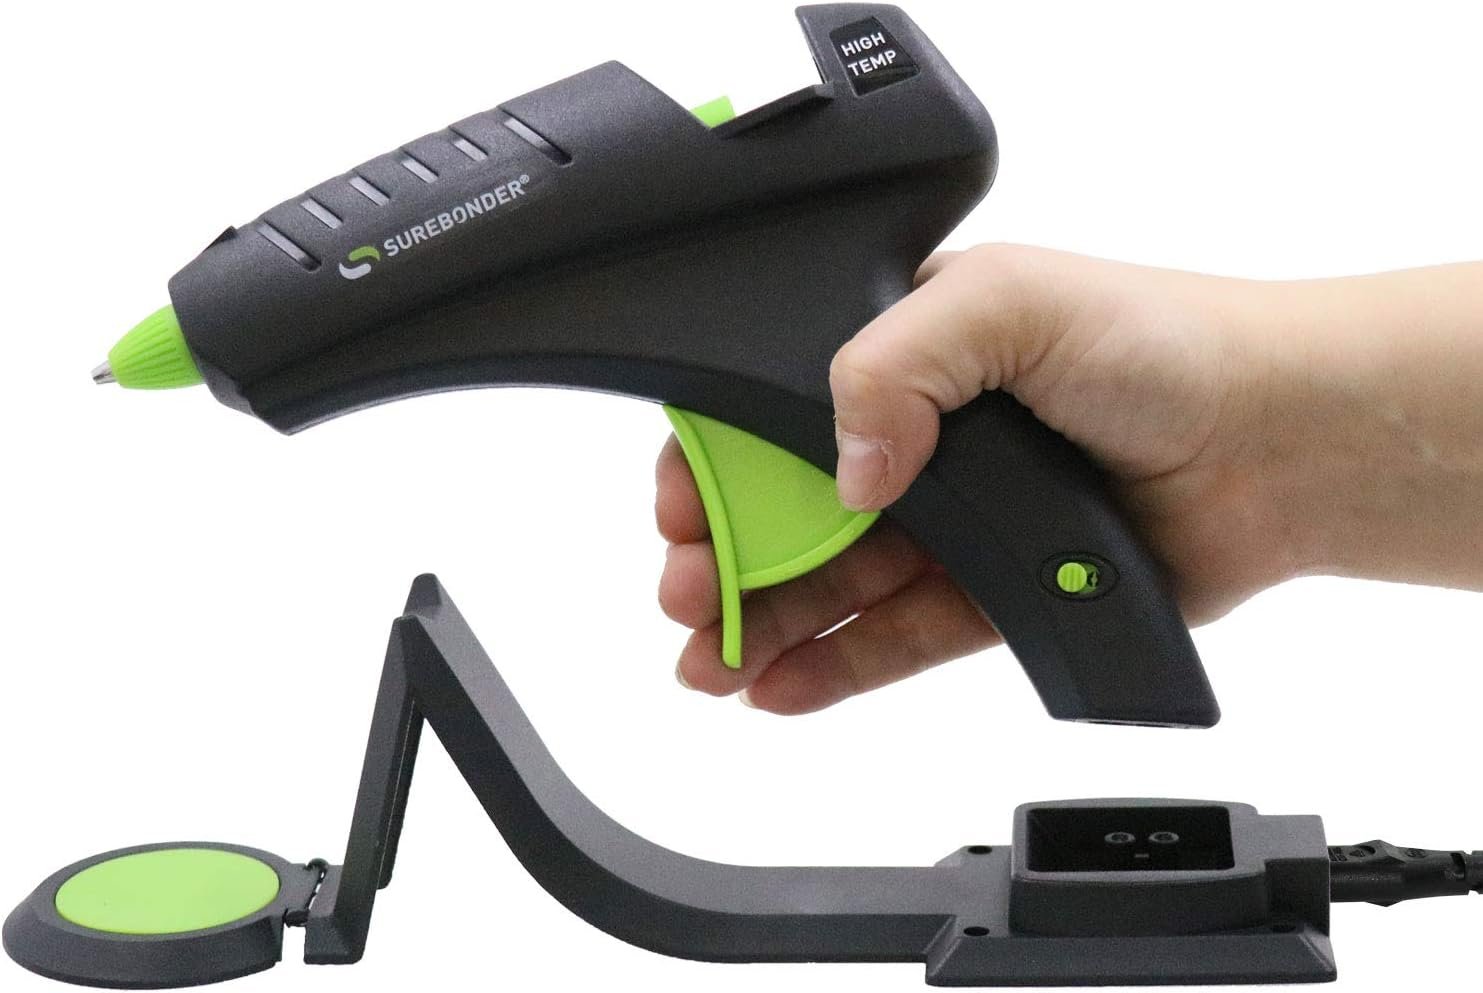
A high quality hot glue gun that is easily portable, quick to heat, and cordless (re-attach to the base when you need the glue to get hot again).
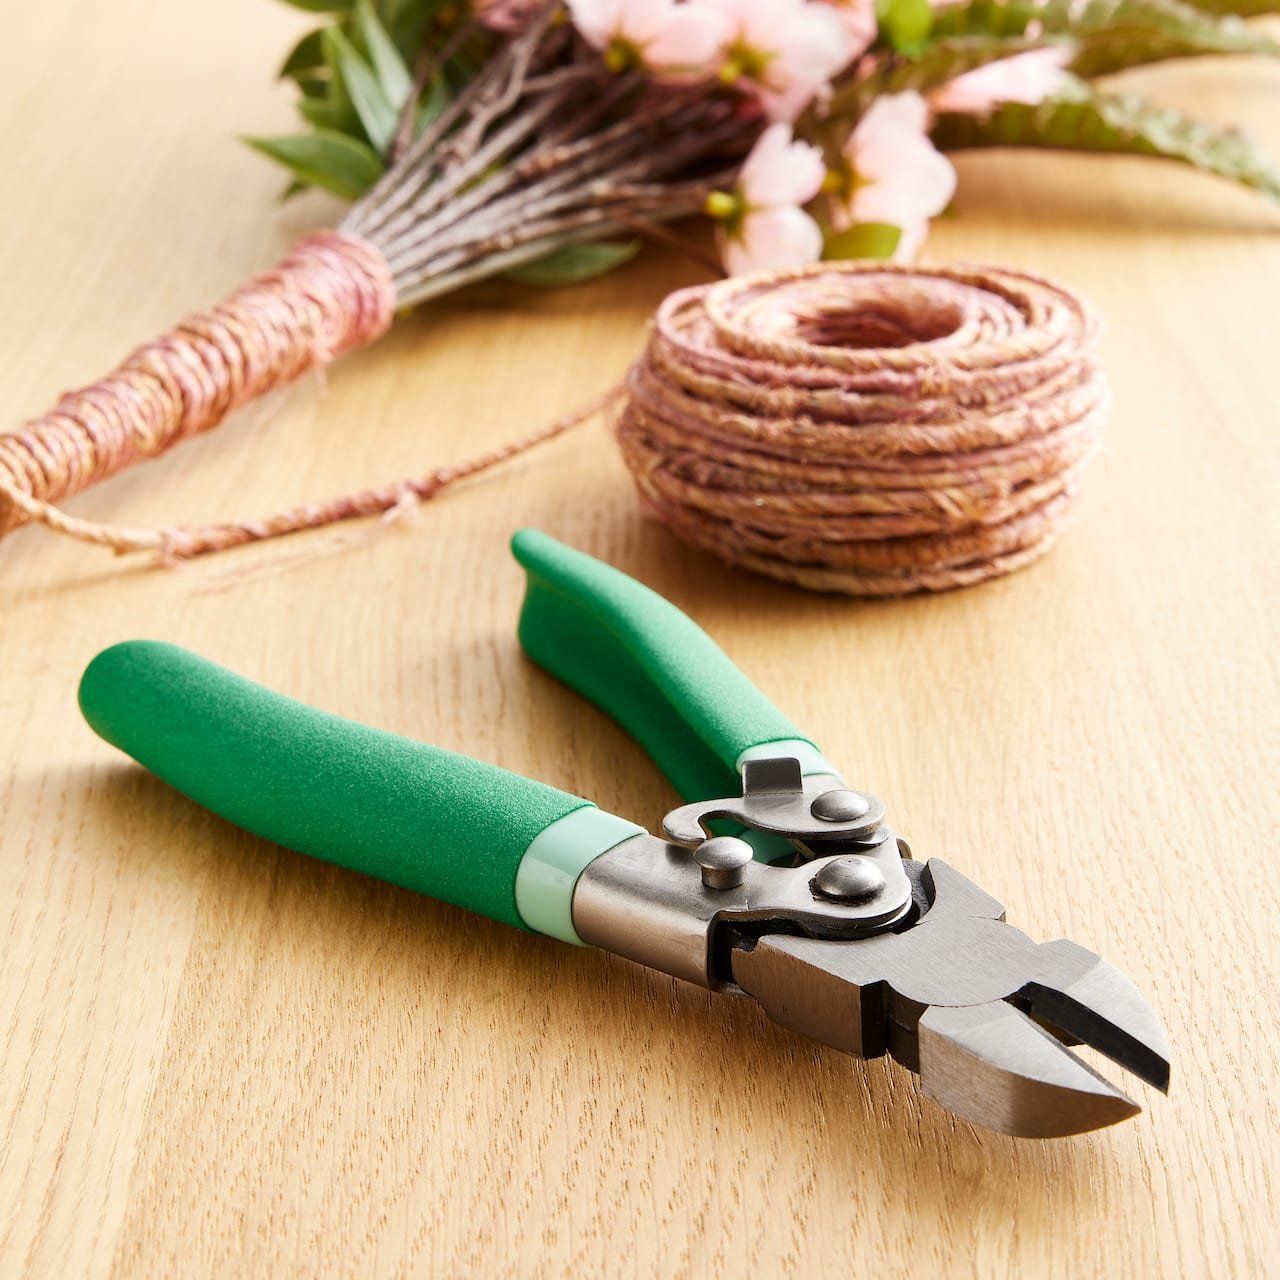
Say goodbye to hand cramps with these wire cutters. I use these whenever I am creating with silk florals or anything to do with wire.

Compatible with the Surebonder hot glue gun. 100-pack and with a great price.
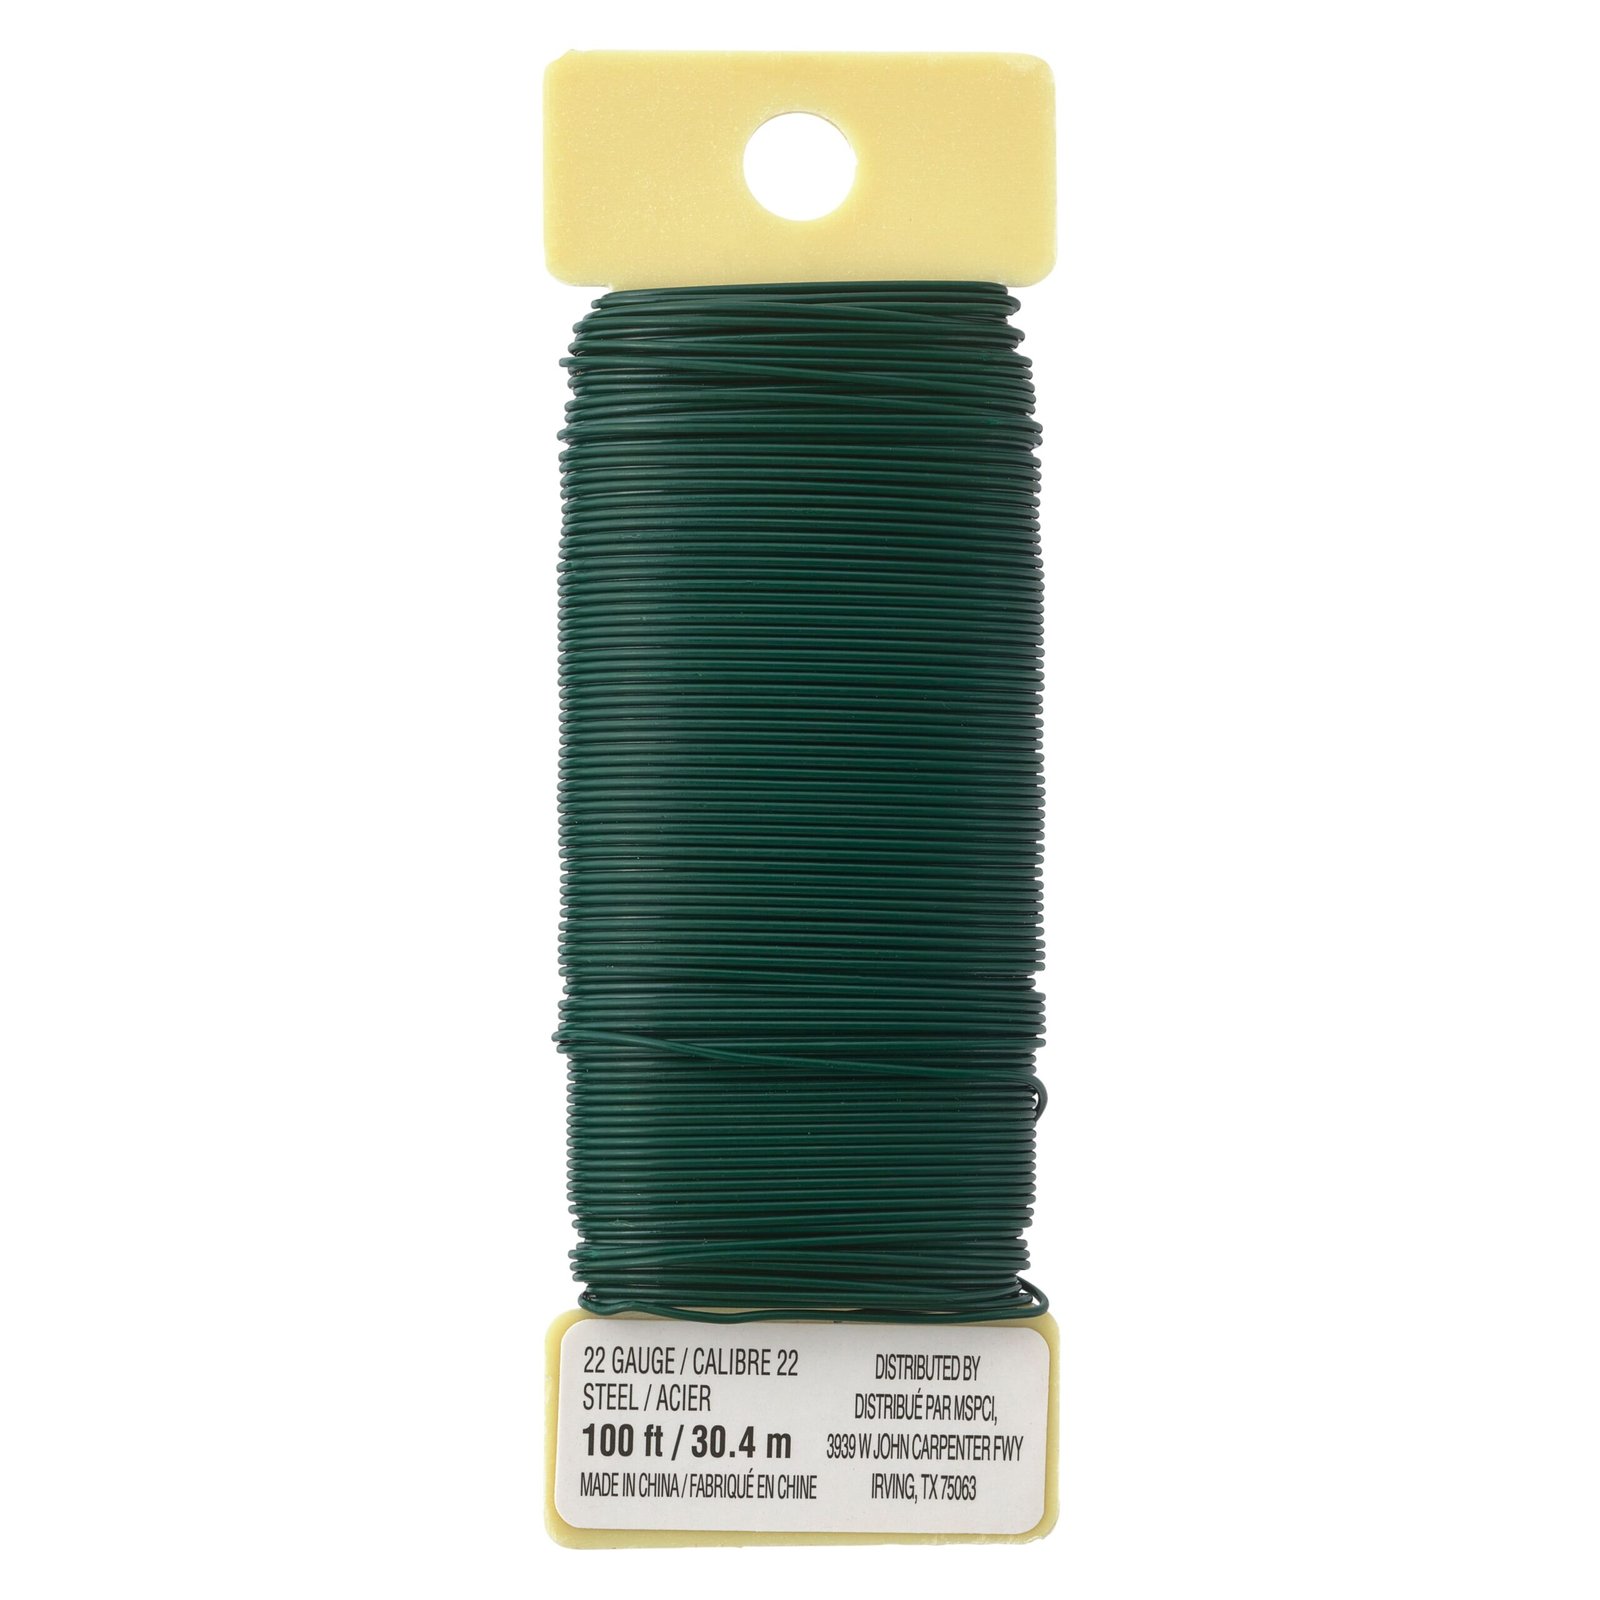
22g floral wire to help secure your arrangements.
Romantic Heart Shaped Wreath with Baby’s Breath

Materials Needed:
- Heart-shaped grapevine wreath base
- Silk roses (red and blush pink were used in the above photo)
- Baby’s breath sprigs (real or faux)
- Eucalyptus leaves (silk or preserved for added greenery)
- Ribbon (satin and lace ribbons in complementary colors, such as burgundy and cream)
- Floral wire
- Wire cutters
- Hot glue gun and glue sticks
Instructions:
1. Prepare the Wreath Base
- Start with a heart-shaped grapevine wreath. Inspect the base to determine which side will hold the majority of the floral arrangement (typically, one side or along the curve of the heart).
- Using your wire cutters, trim the branches that stick out of your wreath and may scratch your door.
2. Plan the Layout
- Arrange the red and blush pink roses along one side of the heart without securing them yet. Place the red roses slightly further apart and fill the gaps with blush pink roses.
- Add baby’s breath sprigs between the roses for a soft, textured look.
- Position eucalyptus leaves to create a lush backdrop for the flowers.
3. Attach the Greenery
- Trim eucalyptus stems to about 3–4 inches.
- Insert the stems into the grapevine wreath, securing with floral wire or hot glue. Arrange them so they fan out slightly, adding depth and coverage.
4. Add the Roses
- Trim the stems of the silk roses to 2–3 inches.
- Secure the roses to the wreath using floral wire or hot glue. Alternate between red and blush pink roses for a balanced, romantic appearance.
- Slightly overlap the roses to create a dense, full arrangement.
5. Incorporate Baby’s Breath
- Cut small sprigs of baby’s breath and tuck them into the spaces between the roses. Secure with hot glue or wire.
- Add additional sprigs around the edges of the greenery to soften the transition between flowers and the wreath base.
6. Attach the Ribbon
- Cut a length of satin ribbon and lace ribbon. Layer the lace over the satin for a detailed, elegant look.
- Tie the ribbons into a bow and secure it to the bottom point of the heart using floral wire or hot glue. Allow the ribbon tails to drape elegantly.
7. Finishing Touches
- Inspect the wreath and adjust any elements that seem out of place.
- Ensure all pieces are securely attached, and trim any excess wire or ribbon.
Tips:
- Placement: Hang the wreath on a contrasting background, like a white or cream wall, to highlight the colors.
- Personalization: Use different flower types or colors to match your personal taste or seasonal themes.
- Durability: Use weather-resistant materials if the wreath will be displayed outdoors.
Evergreen Eucalyptus Wreath

Materials Needed:
- Grapevine wreath base (natural brown grapevine)
- Artificial eucalyptus leaves (multiple shades for depth)
- Faux lamb’s ear stems (soft, muted green foliage)
- Artificial ferns (various sizes for texture)
- White filler flowers (like baby’s breath or small blossoms)
- Floral wire
- Wire cutters
- Hot glue gun and glue sticks
Step-by-Step Instructions:
1. Prepare Your Base
- Begin with a grapevine wreath base. The natural texture and shape are perfect for holding greenery securely.
- Use your wire cutters and trim the branches that stick out of your wreath and may scratch your door.
2. Sort and Trim Greenery
- Trim eucalyptus, lamb’s ear, and fern stems to manageable lengths (approximately 5–8 inches).
- Group similar greenery stems together to make the assembly easier.
3. Attach the Eucalyptus
- Start with the largest eucalyptus stems. Insert them into the grapevine wreath at an angle, following the natural curve of the wreath.
- Secure each stem with floral wire or hot glue. Space them evenly around the wreath to create a balanced base.
4. Add Lamb’s Ear for Softness
- Layer lamb’s ear stems between the eucalyptus. The soft, fuzzy texture contrasts beautifully with the eucalyptus leaves.
- Secure the lamb’s ear with floral wire, ensuring the stems blend naturally with the eucalyptus.
5. Incorporate Fern Bundles
- Add bundles of ferns (not just a stem) to the wreath, focusing on areas that need more texture or volume.
- Position some fronds to extend slightly beyond the edges of the wreath for a wild, organic look.
6. Add Filler Flowers
- Insert small clusters of white filler flowers, like baby’s breath, into any gaps between the greenery.
- Distribute the flowers evenly to provide pops of brightness and softness throughout the wreath.
7. Secure All Elements
- Check each piece of greenery and floral filler to ensure they’re firmly attached. Use additional floral wire or hot glue as needed.
8. Fluff and Adjust
- Adjust the greenery and flowers to ensure they look natural and balanced. Fluff the leaves and stems to create depth and dimension.
Tips:
- Customization: You can substitute greenery types to match your personal style or seasonal preferences.
- Durability: If the wreath will be displayed outdoors, use UV-resistant materials to prevent fading.
- Hanging: Attach a loop of floral wire or ribbon to the back of the wreath for easy hanging.
Orchid Wreath with English Ivy

Materials Needed:
- Gold metal hoop (approximately 12–18 inches in diameter)
- Artificial white orchids (with buds and blooms for a natural cascading effect)
- Artificial ivy vine (realistic and flexible)
- Floral wire
- Wire cutters
- Hot glue gun and glue sticks
- Fishing line or clear thread (optional for invisible hanging)
Step-by-Step Instructions:
1. Prepare the Hoop
- Select a sturdy gold metal hoop as your base.
- Inspect the hoop for any imperfections and ensure it’s clean before starting.
2. Attach the Ivy
- Cut a length of artificial ivy vine that is long enough to wrap around half of the hoop.
- Start at the top left or right of the hoop and secure the ivy with floral wire, wrapping it around the hoop in intervals to keep it secure.
- Let the ivy cascade naturally for an asymmetrical look, extending slightly beyond the bottom of the hoop.
3. Prepare the Orchids
- Trim the orchid stems with wire cutters to your desired lengths. Keep a mix of full blooms and buds for a balanced design.
- Arrange the orchids into a cascading layout, with blooms near the top and buds trailing down for a natural flow.
4. Attach the Orchids
- Starting near the top of the ivy, attach the orchids to the hoop and ivy vine using floral wire. Secure the thicker stems first and adjust the placement of smaller blooms as you go.
- Use hot glue for additional support, especially for smaller blooms or to hide wire connections.
5. Refine the Ivy Placement
- Adjust the ivy leaves around the orchids, ensuring they frame the blooms without overpowering them.
- Let some ivy leaves extend beyond the bottom of the hoop to enhance the natural, cascading effect.
6. Secure and Finish
- Double-check all attachments to ensure they are secure. Reinforce any loose areas with additional floral wire or glue.
- Trim any visible wire or glue strings for a clean finish.
7. Add a Hanging Loop
- Attach a small loop of fishing line, clear thread, or ribbon to the top center of the hoop for hanging. Ensure the loop is tight and blends seamlessly with the design.
Tips:
- Simplicity is Key: Keep the design minimal to maintain the modern, elegant aesthetic.
- Balance: Ensure the ivy and orchids are evenly distributed on the hoop for a cohesive look.
- Personalization: Experiment with different floral colors or greenery types to match your décor.
Monogram Eucalyptus Wreath with White Flowers

Materials Needed:
- Grapevine wreath base (approximately 14–18 inches)
- Artificial eucalyptus leaves (multiple shades of green for depth)
- Artificial white peonies (or similar large blooms, 3–5 pieces)
- Wooden monogram letter (laser-cut with a decorative design)
- Floral wire
- Hot glue gun and glue sticks
- Wire cutters
- Small chain or ribbon (to attach the monogram to the wreath)
Step-by-Step Instructions:
1. Prepare the Wreath Base
- Begin with a clean grapevine wreath base. Its natural texture pairs beautifully with the greenery and flowers.
- Use your wire cutters and trim the branches that stick out of your wreath and may scratch your door.
2. Attach the Eucalyptus
- Trim eucalyptus stems into manageable lengths (5–7 inches).
- Arrange the eucalyptus stems around the wreath in a flowing pattern, following the natural curve of the wreath base.
- Secure the stems with floral wire or hot glue, ensuring even distribution around the entire wreath.
3. Prepare and Attach the Flowers
- Trim the stems of the white peonies to about 2–3 inches.
- Position the flowers symmetrically on one side of the wreath, leaving space for the monogram in the center. Typically, three peonies on one side and two on the other work well for balance.
- Secure the flowers with hot glue or floral wire, ensuring they sit snugly against the eucalyptus.
4. Add the Wooden Monogram
- Attach a small chain, ribbon, or fishing line to the top of the wooden monogram letter.
- Center the monogram within the wreath and secure it to the grapevine base by tying or gluing the chain or ribbon to the wreath. Adjust the length so the monogram hangs neatly in the center.
5. Secure and Adjust
- Double-check that all elements (greenery, flowers, and the monogram) are securely attached.
- Fluff and adjust the eucalyptus leaves and flowers for a natural, full look.
Tips:
- Color Coordination: Use peonies or blooms in other colors to match your décor or seasonal themes.
- Customization: Paint or stain the wooden monogram to match your personal style.
- Durability: Use UV-resistant materials if the wreath will be displayed outdoors.
Cheery Citrus Wreath

Materials Needed:
- Grapevine wreath base (14–18 inches in diameter)
- Artificial citrus fruits (oranges, lemons, and limes, both whole and sliced)
- Artificial white flowers (jasmine or dogwood-style blooms)
- Artificial green leaves (eucalyptus, lemon leaves, or ficus leaves for fullness)
- Floral wire
- Wire cutters
- Hot glue gun and glue sticks
- Floral picks or skewers (for securing fruits)
- Scissors
Step-by-Step Instructions:
1. Prepare the Wreath Base
- Begin with a grapevine wreath base. Its natural texture will serve as a sturdy foundation for the citrus fruits and greenery.
- Use your wire cutters and trim the branches that stick out of your wreath and may scratch your door.
2. Attach Greenery
- Trim the stems of your artificial leaves to manageable lengths (5–8 inches).
- Insert the stems into the grapevine wreath and secure them with floral wire or hot glue. Cover the entire wreath base with greenery to create a lush background.
3. Prepare the Citrus Fruits
- Use a mix of whole and sliced artificial citrus fruits for variety.
- For whole fruits, attach floral picks or skewers to the bottoms to make them easier to insert into the wreath.
- For sliced fruits, apply hot glue to the back and attach them directly to the greenery.
4. Attach the Citrus Fruits
- Begin adding the citrus fruits, starting with the larger whole oranges and lemons.
- Distribute the fruits evenly around the wreath, alternating between whole fruits and slices for a balanced look.
- Secure each fruit with floral wire or hot glue, ensuring they are firmly attached.
5. Add White Flowers
- Insert small clusters of artificial white flowers around the wreath, tucking them between the fruits and greenery.
- Secure the flowers with hot glue or wire to ensure they stay in place.
6. Fill in Gaps
- Check for any empty spaces and fill them with additional leaves, small flowers, or citrus slices to create a full, cohesive look.
7. Secure and Adjust
- Ensure all elements are firmly attached. Adjust the placement of fruits, flowers, and leaves as needed to maintain balance and visual appeal.
Tips:
- Layering: Start with greenery, then add larger fruits, followed by smaller fruits and flowers to build depth.
- Customization: Use different fruit types or flower colors to match seasonal themes or personal preferences.
- Durability: If the wreath will be displayed outdoors, use weather-resistant materials to prevent fading.
Vintage-Inspired Lace and Rose Wreath

Materials Needed:
- Foam wreath form (10-12 inches in diameter)
- Lace fabric or lace ribbon (enough to wrap the entire wreath form)
- Dried roses (in shades of dusty pink and burgundy)
- Faux pearl strings (or pearl embellishments)
- Vintage buttons (a mix of sizes and styles)
- Small faux berry stems (in muted pink or burgundy tones)
- Hot glue gun and glue sticks
- Scissors
- Straight pins (optional, to secure lace)
Step-by-Step Instructions:
1. Wrap the Wreath Form with Lace
- Take your lace fabric or ribbon and wrap it around the foam wreath form.
- Overlap each layer slightly as you go to ensure full coverage.
- Secure the lace at the start and end with hot glue or straight pins.
2. Plan Your Layout
- Arrange the dried roses, faux berry stems, vintage buttons, and pearl strings on one side of the wreath.
- Start with the largest elements (like the roses) and work your way to smaller embellishments to ensure a balanced look.
3. Attach the Dried Roses
- Trim the stems of the dried roses to about 1 inch.
- Use hot glue to attach the roses to one section of the wreath. Cluster them together for a full, dramatic effect.
4. Add the Faux Berry Stems
- Trim the berry stems into small sections and tuck them around the roses.
- Secure the stems with hot glue, allowing them to peek out naturally between the roses.
5. Incorporate the Vintage Buttons
- Select a mix of buttons in various sizes and colors to complement the roses and lace.
- Glue the buttons in small clusters near the roses, adding a touch of vintage charm.
6. Add Pearl Strings
- Cut small sections of faux pearl strings and loop them around the roses and buttons.
- Secure the pearls with hot glue, ensuring they drape naturally.
7. Finishing Touches
- Double-check that all elements are securely attached.
- Adjust the placement of berries, pearls, and buttons to create a cohesive, layered design.
Tips:
- Authenticity: Use real vintage buttons or brooches for a truly unique touch.
- Preservation: Use preserved or high-quality faux roses if you want the wreath to last longer.
- Hanging: Add a small loop of lace or ribbon to the back of the wreath for hanging.
Succulent & Lavender Hoop Wreath

Materials Needed:
- Wooden or metal hoop (12–18 inches in diameter)
- Artificial succulents (a variety of shapes and sizes for dimension)
- Artificial lavender sprigs (for pops of color)
- Small white filler flowers (like baby’s breath or similar)
- Artificial greenery stems (eucalyptus, lamb’s ear, or other soft greenery)
- Floral wire
- Wire cutters
- Hot glue gun and glue sticks
- Gold or neutral ribbon (for hanging, optional)
Step-by-Step Instructions:
1. Prepare Your Hoop
- Select a smooth wooden or metal hoop as your base.
- If using a metal hoop, you can leave it bare or spray paint it to match your décor. For a wooden hoop, ensure it’s clean and smooth.
2. Plan Your Layout
- Arrange your succulents, lavender, filler flowers, and greenery on the lower portion of the hoop without securing them.
- Start with the larger succulents as focal points, then layer smaller elements around them.
3. Attach the Greenery
- Trim greenery stems to manageable lengths (5–7 inches).
- Secure the greenery to the lower half of the hoop with floral wire, wrapping the wire tightly around the hoop to hold the stems in place.
- Allow some greenery to extend slightly beyond the hoop for a natural, cascading effect.
4. Add the Succulents
- Attach the artificial succulents by applying hot glue to the base of each succulent and pressing them firmly onto the greenery.
- Position the largest succulents in the center, with smaller ones on either side to create balance.
5. Incorporate the Lavender
- Insert lavender sprigs between the greenery and succulents, allowing the purple tones to contrast with the greens.
- Secure the sprigs with floral wire or hot glue, ensuring they drape naturally.
6. Add Filler Flowers
- Tuck small white filler flowers around the succulents and greenery for additional texture and brightness.
- Use hot glue to secure the flowers in place.
7. Secure and Finish
- Double-check that all elements are firmly attached and adjust as needed.
- If desired, attach a gold or neutral ribbon to the top of the hoop for hanging.
Tips:
- Balance: Place succulents asymmetrically on the bottom half of the hoop for a modern and elegant look.
- Layering: Build up the design gradually, starting with greenery and adding succulents and flowers for depth.
- Durability: Use high-quality faux materials for a long-lasting design.
Fresh (Appearing) Herb Wreath

Materials Needed:
- Grapevine or wire wreath base (10–12 inches)
- Fresh rosemary sprigs (or faux rosemary for longevity)
- Fresh or faux lavender stems
- Small yellow and white flowers (like chamomile, daisies, or wildflowers)
- Twine or jute rope (for securing and adding a rustic bow)
- Floral wire
- Wire cutters
- Scissors
Step-by-Step Instructions:
1. Prepare the Base
- Start with a small grapevine or wire wreath base. A natural grapevine base works well for holding fresh herbs securely.
- Use your wire cutters and trim the branches that stick out of your wreath and may scratch your door.
2. Sort and Trim Your Greenery
- Trim rosemary sprigs to about 6–8 inches in length.
- Separate lavender stems and other flowers into small bundles for easy arrangement.
3. Attach the Rosemary
- Begin layering the rosemary sprigs around the wreath base. Place them at a slight angle to follow the circular shape.
- Secure each sprig to the base using floral wire. Overlap the sprigs slightly to cover the base and create a full, lush look.
4. Add Lavender Stems
- Insert lavender stems evenly around the wreath, tucking them between the rosemary sprigs.
- Secure the lavender with floral wire, allowing some stems to extend outward for a natural, airy feel.
5. Incorporate Small Yellow and White Flowers
- Add small clusters of yellow and white flowers throughout the wreath to brighten the design.
- Distribute the flowers evenly, securing them with floral wire or tucking them into the grapevine base.
6. Tie a Twine Bow
- Cut a piece of jute rope or twine and tie it into a simple bow.
- Attach the bow to the top or bottom of the wreath using floral wire for a rustic finishing touch.
7. Secure and Adjust
- Double-check that all elements are firmly attached and adjust any sprigs or flowers that are out of place.
- Trim any excess stems or wire for a neat, polished look.
8. Optional Hanging Loop
- Create a small loop of twine or ribbon and attach it to the back of the wreath for hanging.
Tips:
- Freshness: If using fresh herbs, mist the wreath lightly with water to keep it fresh longer. Replace dried herbs or flowers as needed.
- Longevity: Use faux herbs and flowers if you want the wreath to last longer.
- Customization: Add other herbs like thyme or sage for variety and fragrance.
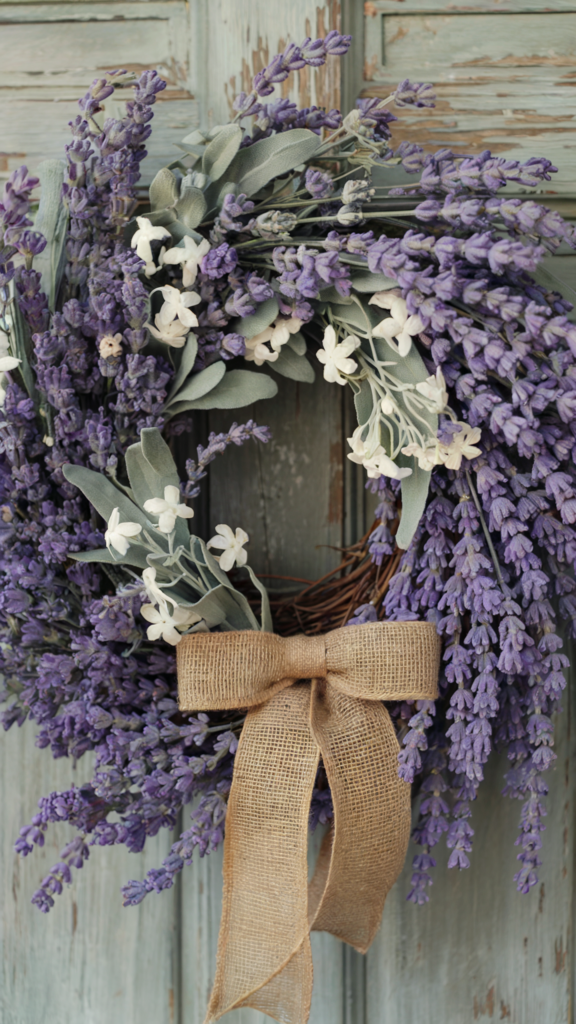
Rustic Lavender Wreath with White Flowers
Materials Needed:
- Grapevine wreath base (14–18 inches in diameter)
- Artificial lavender stems (choose high-quality, realistic stems for fullness)
- Small white filler flowers (like jasmine or baby’s breath)
- Artificial lamb’s ear leaves (for added texture and softness)
- Burlap ribbon (for the bow)
- Floral wire
- Wire cutters
- Hot glue gun and glue sticks
Step-by-Step Instructions:
1. Prepare the Wreath Base
- Start with a natural grapevine wreath base, which provides a sturdy foundation and rustic look.
- Use your wire cutters and trim the branches that stick out of your wreath and may scratch your door.
2. Sort and Trim the Lavender
- Trim the lavender stems to approximately 6–8 inches long. Sort the stems into bundles of 3–5 for easier placement.
3. Attach the Lavender
- Begin layering the lavender stems around the wreath base, following the natural curve of the grapevine.
- Secure each bundle to the base using floral wire. Overlap the bundles slightly to create a full, layered look.
- Continue attaching lavender until the entire wreath is covered or until you achieve the desired coverage.
4. Add Lamb’s Ear Leaves
- Insert lamb’s ear leaves between the lavender bundles for added texture and a soft, muted green contrast.
- Secure the leaves with floral wire or hot glue. Arrange them to peek out naturally from the lavender.
5. Incorporate White Flowers
- Add small clusters of white filler flowers to break up the lavender and provide pops of brightness.
- Tuck the flowers evenly around the wreath and secure them with hot glue or floral wire.
6. Create and Attach the Burlap Bow
- Cut a length of burlap ribbon (approximately 24–30 inches) and tie it into a bow.
- Trim the ribbon tails at an angle for a polished look.
- Attach the bow to the bottom center of the wreath using floral wire or hot glue.
7. Adjust and Finalize
- Check the wreath for any gaps or uneven areas and fill them with additional lavender, leaves, or flowers.
- Fluff the lavender and adjust the placement of the elements to ensure a cohesive and full design.
Tips:
- Customization: Add lavender essential oil to the artificial stems for a fragrant touch.
- Balance: Keep the lavender as the main focus, using other elements sparingly for balance.
- Durability: Use UV-resistant materials if displaying the wreath outdoors to prevent fading.
Charming Garden-Themed Wreath

Materials Needed:
- Grapevine wreath base (14–16 inches in diameter)
- Artificial greenery (e.g., lamb’s ear, eucalyptus, or other soft foliage)
- Artificial flowers (yellow marigolds, daisies, lavender, and other small blooms)
- Miniature gardening tools (e.g., a small trowel and watering can)
- Artificial ladybugs (or similar small accents)
- Floral wire
- Hot glue gun and glue sticks
- Wire cutters
- Moss (optional, for filling gaps and adding texture)
Step-by-Step Instructions:
1. Prepare the Wreath Base
- Begin with a grapevine wreath base. Its rustic texture complements the garden theme and provides a sturdy structure for your decorations.
- Use your wire cutters and trim the branches that stick out of your wreath and may scratch your door.
2. Attach the Greenery
- Trim artificial greenery stems to about 6–8 inches in length.
- Insert the stems into the grapevine wreath, following the natural curve of the wreath. Secure them with floral wire or hot glue.
- Allow some greenery to extend outward for a lush, natural appearance.
3. Add the Flowers
- Arrange the artificial flowers around the wreath, clustering them in a few focal points. Position larger blooms (like marigolds) prominently, and fill in gaps with smaller flowers like daisies and lavender.
- Secure each flower with hot glue or floral wire. Distribute the colors evenly for a balanced design.
4. Attach the Mini Gardening Tools
- Position the miniature trowel and watering can on one side of the wreath for a playful, asymmetrical look.
- Secure the tools using floral wire wrapped tightly around the handles. You can also use hot glue for additional stability.
5. Add the Ladybugs
- Attach artificial ladybugs to the flowers, greenery, and even the tools using hot glue. Place them sparingly for a whimsical touch.
6. Incorporate Moss
- Tuck small pieces of moss into the wreath base to fill any empty spaces and add texture. Secure the moss with hot glue.
7. Secure and Adjust
- Check that all elements are securely attached. Adjust the placement of flowers, greenery, and accents for a cohesive, finished look.
8. Add a Hanging Loop
- Attach a loop of ribbon or twine to the back of the wreath for easy hanging.
Tips:
Durability: Use UV-resistant materials if the wreath will be displayed outdoors to prevent fading.
Customization: Use different gardening-themed items, such as a mini rake or flower pot, to personalize the design.
Balance: Keep the tools and decorations concentrated on one side or the bottom of the wreath to avoid overwhelming the design.
Purple and Blue Hydrangea Wreath

Materials Needed:
- Grapevine wreath base (14–18 inches in diameter)
- Artificial hydrangea blooms (large heads in shades of purple, pink, and blue)
- Artificial green hydrangea leaves (or similar large, leafy greenery)
- Floral wire
- Wire cutters
- Hot glue gun and glue sticks
Step-by-Step Instructions:
1. Prepare the Hydrangea Blooms
- Remove the hydrangea heads from their stems, leaving about 1–2 inches of stem attached to the bloom for easy attachment.
- Sort the blooms by color (purple, pink, and blue) to create a balanced arrangement.
2. Attach Greenery to the Wreath Base
- Use your wire cutters and trim the branches that stick out of your wreath and may scratch your door.
- Trim the artificial leaves to manageable lengths, keeping small clusters of 2–3 leaves together for a fuller look.
- Tuck the leafy stems into the grapevine wreath and secure them with floral wire or hot glue. Cover the entire wreath evenly with leaves to create a lush, green background.
3. Arrange the Hydrangea Blooms
- Start by placing the largest hydrangea blooms around the wreath. Alternate the colors (purple, pink, and blue) to create a visually pleasing arrangement.
- Position the blooms so they slightly overlap, covering most of the wreath base.
4. Secure the Blooms
- Insert the stems of the hydrangea blooms into the grapevine wreath. Use hot glue or floral wire to secure each bloom firmly.
- Ensure the blooms sit snugly against the wreath and adjust their angles to create a natural, rounded shape.
5. Fill in Gaps
- Check for any gaps between the flowers. Use smaller hydrangea blooms, extra leaves, or smaller pieces of greenery to fill in these spaces.
- Secure additional elements with hot glue or wire.
6. Final Adjustments
- Fluff and adjust the hydrangea petals and leaves to ensure a uniform and full appearance.
- Trim any excess wire or visible glue for a clean finish.
Tips:
Personalization: Add small embellishments like ribbons or a bow to customize the wreath for specific seasons or occasions.
Color Balance: Distribute the colors evenly around the wreath to maintain harmony and avoid clustering similar hues together.
Durability: If displaying the wreath outdoors, use UV-resistant materials to prevent fading from sunlight.
Woodland Cottagecore Wreath

Materials Needed:
- Grapevine wreath base(12–14 inches)
- Artificial ferns and greenery (various shades and textures)
- Faux moss (sheet or loose moss for ground cover)
- Artificial mushrooms (red and white toadstools, and other woodland mushrooms)
- Forest figurines (small owls, squirrels, birds, or similar woodland animals)
- Floral wire
- Hot glue gun and glue sticks
- Wire cutters
- Optional: Small twigs or pinecones (for added texture)
Step-by-Step Instructions:
1. Prepare the Wreath Base
- Start with a natural grapevine wreath, which complements the woodland theme and serves as a sturdy base.
- Use your wire cutters and trim the branches that stick out of your wreath and may scratch your door.
2. Attach the Ferns
- Trim the artificial ferns to 6–8 inches.
- Insert the fern stems into the lower half of the grapevine wreath, creating a lush base for the woodland scene.
- Secure the ferns with floral wire or hot glue, allowing them to cascade slightly for a natural look.
3. Add Moss
- Cover the bottom section of the wreath with faux moss. Use hot glue to attach the moss securely to the wreath base.
- Ensure the moss overlaps the ferns slightly to create a seamless ground effect.
4. Place the Mushrooms
- Arrange the artificial mushrooms among the moss and ferns. Use a mix of sizes and styles (e.g., red and white toadstools with larger natural-toned mushrooms) to create variety.
- Attach the mushrooms with hot glue, ensuring they sit securely on the moss.
5. Add Forest Figurines
- Position small woodland figurines like owls, squirrels, and birds within the moss and ferns.
- Glue the figurines into place, ensuring they are visible and balanced within the design.
6. Optional: Add Twigs or Pinecones
- Incorporate small twigs or pinecones to enhance the woodland vibe. Tuck them into the ferns or place them near the figurines.
- Secure with hot glue as needed.
7. Check and Adjust
- Inspect the wreath for any gaps or uneven areas. Add more moss, ferns, or small decorative elements to fill in as needed.
- Adjust the placement of mushrooms and figurines for a balanced and visually appealing arrangement.
8. Add a Hanging Loop
- Attach a loop of twine or ribbon to the back of the wreath for easy hanging.
Tips:
Customization: Add personal touches like small fairy lights or additional woodland critters for a magical effect.
Theme Consistency: Stick to earthy tones and natural-looking elements to maintain the woodland theme.
Durability: If displaying outdoors, ensure the wreath is in a covered area to protect it from moisture and wind.
Cutesy Birds Nest Wreath

Materials Needed:
- Grapevine wreath base (12–14 inches in diameter)
- Small grapevine bird’s nest (or a pre-made faux nest)
- Artificial speckled eggs (3–5 pieces)
- Artificial greenery (e.g., eucalyptus, ficus leaves, or budding stems)
- Artificial branches (for added texture and height)
- Small bird figurines (2 pieces)
- Floral wire
- Hot glue gun and glue sticks
- Wire cutters
- Twine or jute string (optional for hanging)
Step-by-Step Instructions:
1. Prepare the Wreath Base
- Start with a natural grapevine wreath, which matches the rustic style of the design.
- Use your wire cutters and trim the branches that stick out of your wreath and may scratch your door.
- Inspect the wreath to determine where the bird’s nest and greenery will be placed (typically at the bottom).
2. Secure the Bird’s Nest
- Position the small grapevine bird’s nest at the bottom center of the wreath.
- Attach the nest securely to the wreath base using floral wire. Wrap the wire tightly around the nest and through the grapevine wreath to hold it in place.
- Add a few drops of hot glue for extra stability if needed.
3. Add the Speckled Eggs
- Place the artificial speckled eggs inside the bird’s nest. Arrange them naturally to mimic how real eggs would lie.
- Secure the eggs with hot glue to keep them from moving.
4. Attach the Greenery
- Trim the greenery stems to manageable lengths (6–8 inches).
- Insert the stems into the grapevine wreath around the nest, focusing on both sides of the wreath. Position the greenery to create a full and lush effect.
- Secure the greenery with floral wire or hot glue.
5. Incorporate Artificial Branches
- Add artificial branches to the top and sides of the wreath for height and a natural touch. Let the branches extend slightly beyond the wreath’s frame.
- Secure the branches by tucking them into the grapevine and reinforcing with hot glue.
6. Place the Bird Figurines
- Position the bird figurines on either side of the nest, perched on the greenery or wreath base.
- Use hot glue to attach the figurines securely.
7. Check and Adjust
- Inspect the wreath for any gaps or uneven areas. Add more greenery or small floral accents to fill any spaces.
- Fluff and adjust the greenery and branches to achieve a balanced look.
8. Add a Hanging Loop
- Attach a loop of twine or jute string to the top of the wreath for easy hanging.
Tips:
Durability: Use weather-resistant materials if displaying outdoors.
Natural Look: Use soft and muted greenery with buds or small flowers for a springtime aesthetic.
Customization: Add small embellishments like a ribbon or seasonal flowers for a personalized touch.
Pastel Dainty Floral Wreath

Materials Needed:
- Foam wreath form (10-12 inches)
- Artificial baby’s breath (for a soft, airy background)
- Artificial pastel flowers (carnations or roses in peach, pink, white, and lavender)
- Floral pins (for attaching flowers)
- Hot glue gun and glue sticks
- Wire cutters
- Soft organza or satin ribbon (for the bow and hanging loop)
- Pearl embellishment (optional, for the center of the bow)
Step-by-Step Instructions:
1. Prepare the Wreath Form
- Start with a plain foam wreath form.
- If using a non-white foam wreath form, wrap the foam with white ribbon or fabric to create a clean base and prevent any gaps from showing.
2. Attach the Baby’s Breath
- Cut the baby’s breath into small clusters, about 3–4 inches in length.
- Use hot glue or floral pins to attach the clusters to the foam wreath form. Cover the entire wreath evenly with baby’s breath to create a fluffy, textured base.
3. Prepare the Flowers
- Trim the stems of the artificial flowers to about 1–2 inches.
- Sort the flowers by color to make it easier to plan their placement.
4. Arrange and Attach the Flowers
- Start by placing the largest flowers (e.g., carnations or roses) evenly around the wreath. Alternate colors to create a balanced, pastel arrangement.
- Use hot glue or floral pins to secure the flowers to the foam base.
- Fill in any gaps between the larger flowers with smaller blooms or extra clusters of baby’s breath.
5. Create and Attach the Bow
- Cut a length of organza or satin ribbon (approximately 24–30 inches) and tie it into a bow.
- Add a pearl embellishment to the center of the bow for a touch of elegance, securing it with hot glue.
- Attach the bow to the bottom center of the wreath using hot glue or floral wire.
6. Add a Hanging Loop
- Cut another length of ribbon and create a loop for hanging.
- Secure the loop to the top of the wreath with hot glue or by tying it around the foam base.
7. Final Adjustments
- Inspect the wreath for any uneven areas or gaps. Add extra baby’s breath or small flowers as needed.
- Fluff the flowers and adjust their angles to create a full, rounded appearance.
Tips:
Durability: Use high-quality faux materials if the wreath will be displayed for an extended period.
Color Coordination: Stick to a pastel palette for a soft, cohesive look.
Customization: Add additional accents like pearls, beads, or small butterflies for a personalized touch.
Rustic Daffodil Grapevine Wreath

Materials Needed:
- Grapevine wreath base (14–16 inches in diameter)
- Artificial daffodils (yellow with white centers)
- Artificial lilacs (soft purple)
- Greenery stems (e.g., faux grass or long leaves)
- Wooden or metal “Welcome” sign (small and lightweight)
- Pastel satin ribbon (for the bow, preferably light blue or mint)
- Floral wire
- Hot glue gun and glue sticks
- Wire cutters
- Twine (for hanging, optional)
Step-by-Step Instructions:
1. Prepare the Wreath Base
- Start with a grapevine wreath, leaving the top and right sections exposed for a rustic look.
- Use your wire cutters and trim the branches that stick out of your wreath and may scratch your door.
2. Attach the Greenery
- Trim the greenery stems to 6–8 inches.
- Insert the greenery stems into the left side of the wreath base, focusing on the bottom quarter.
- Secure the greenery with floral wire or hot glue, allowing the stems to extend outward naturally.
3. Add the Daffodils
- Trim the daffodil stems to about 6–8 inches.
- Arrange the daffodils evenly within the greenery on the left side of the wreath.
- Attach the flowers securely using hot glue or floral wire, ensuring they are angled outward for a natural effect.
4. Incorporate the Lilacs
- Trim the lilac stems to a similar length and place them among the daffodils.
- Position the lilacs slightly higher for a layered effect, mixing them naturally with the greenery and daffodils.
- Secure the lilacs with hot glue or floral wire.
5. Attach the “Welcome” Sign
- Position the “Welcome” sign on the right side of the wreath, where the grapevine base is exposed.
- Use floral wire to attach the sign securely to the grapevine base. Ensure it hangs straight and is firmly in place.
6. Create and Attach the Bow
- Cut a length of pastel satin ribbon (about 24–30 inches) and tie it into a simple bow.
- Trim the ribbon tails at an angle for a polished look.
- Attach the bow to the base of the greenery cluster on the left side of the wreath using hot glue or floral wire.
7. Add a Hanging Loop
- If needed, attach a loop of twine to the top of the wreath for easy hanging.
Tips:
Durability: Use UV-resistant materials if the wreath will be displayed outdoors.
Color Coordination: Choose a ribbon and flower colors that complement each other for a cohesive design.
Placement: Ensure the flowers and greenery are asymmetrical to create a dynamic, rustic aesthetic.
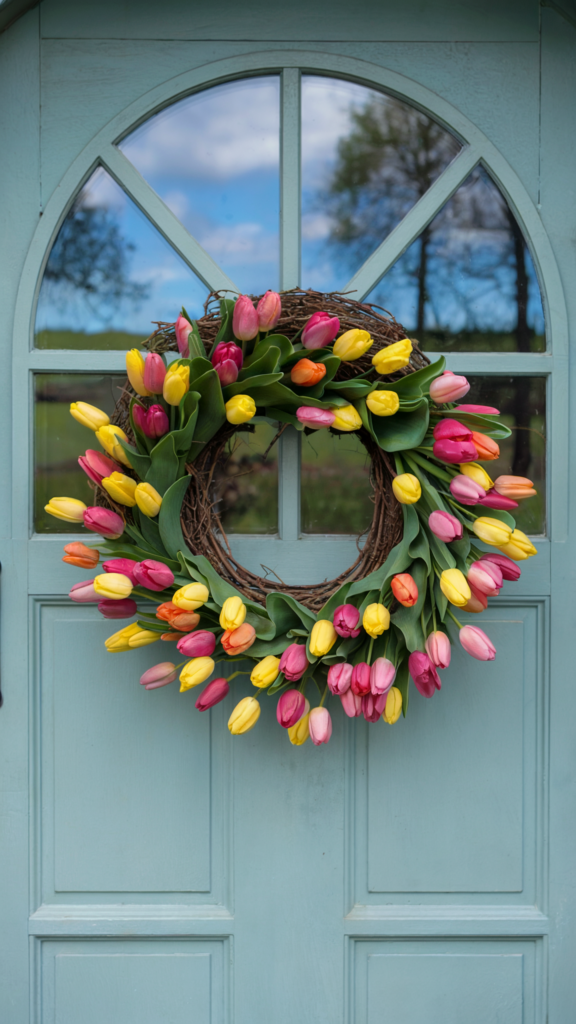
Cheery Tulip Wreath
Materials Needed:
- Grapevine wreath base (16–18 inches in diameter)
- Artificial tulips (in assorted colors like pink, yellow, orange, and red)
- Approximately 40–50 tulip stems, depending on the size of the wreath and the fullness desired.
- Artificial tulip leaves (or use the leaves that come attached to the tulip stems)
- Floral wire
- Hot glue gun and glue sticks
- Wire cutters
- Ribbon (optional, for hanging)
Step-by-Step Instructions:
1. Prepare the Tulip Stems
- Trim the tulip stems to about 5–6 inches using wire cutters.
- If the stems have attached leaves, adjust them to ensure they are close to the tulip blooms for a natural look.
2. Plan Your Layout
- Use your wire cutters and trim any branches that stick out of your grapevine wreath and may scratch your door.
- Arrange the tulips in a circular pattern around the grapevine wreath, alternating colors to create a balanced and vibrant appearance.
- Slightly overlap the blooms to ensure a full, lush look.
3. Attach the Tulips
- Begin attaching the tulips at one section of the wreath. Insert the stems into the grapevine base at an angle, following the curve of the wreath.
- Secure each stem with floral wire by wrapping it tightly around the stem and wreath base.
- Continue attaching the tulips in the same direction around the wreath, ensuring the colors are evenly distributed.
4. Add Leaves
- After attaching the tulip blooms, insert tulip leaves around the wreath to fill any gaps and add texture.
- Secure the leaves with hot glue or floral wire. Ensure the leaves overlap slightly for a natural appearance.
5. Adjust and Fluff
- Once all the tulips and leaves are attached, step back and inspect the wreath for any bare spots or uneven areas.
- Adjust the blooms and leaves as needed to create a balanced, symmetrical design.
6. Optional: Add a Hanging Ribbon
- If desired, attach a loop of ribbon or twine to the top of the wreath for hanging.
- You can also add a decorative bow for extra flair, but the simple and clean tulip design is stunning on its own.
Tips:
Customization: Adjust the color palette to suit specific seasons or occasions (e.g., pastels for Easter or brighter colors for summer).
Fullness: To create a fuller look, layer the tulips slightly as you go, ensuring they overlap for a dense, vibrant wreath.
Durability: Use high-quality faux tulips for a more realistic and long-lasting wreath.
Boho-Inspired Macrame Pampas Wreath

Materials Needed:
- Grapevine wreath base (14–16 inches in diameter)
- Dried pampas grass (approximately 8–10 stems)
- Artificial or dried flowers:
- Neutral-toned roses (cream, blush, or peach)
- Dried dahlias or similar large blooms
- Small filler flowers (e.g., dried baby’s breath or buds)
- Artificial eucalyptus leaves or other muted greenery
- Macramé hanger or small macramé wall hanging (to drape below the wreath)
- Floral wire
- Hot glue gun and glue sticks
- Wire cutters
- Twine (optional for hanging)
Step-by-Step Instructions:
1. Prepare the Grapevine Wreath Base
- Start with a natural grapevine wreath. Its rustic texture complements the boho style and provides a sturdy base for the decorations.
- Use your wire cutters and trim the branches that stick out of your wreath and may scratch your door.
2. Attach the Pampas Grass
- Trim the pampas grass stems to about 10–12 inches.
- Layer the pampas grass on one side of the wreath, arranging the stems so they radiate outward.
- Secure each stem with floral wire by wrapping it tightly around the base and through the grapevine wreath. Use hot glue for additional stability.
3. Add Eucalyptus and Greenery
- Trim eucalyptus stems to about 6–8 inches.
- Insert the greenery around the base of the pampas grass to fill in gaps and add texture.
- Secure with floral wire or hot glue, ensuring the greenery blends naturally with the pampas grass.
4. Place the Flowers
- Arrange the roses and other focal flowers at the center of the pampas grass cluster. Place larger blooms first and then layer smaller ones.
- Secure the flowers with hot glue or floral wire, ensuring they are tightly attached to the wreath base.
- Add filler flowers (e.g., dried baby’s breath) around the main blooms for added dimension and softness.
5. Attach the Macramé
- Position the macramé hanger so it drapes below the wreath.
- Secure the macramé to the bottom of the wreath using floral wire or hot glue. Ensure it hangs symmetrically and is tightly secured to the grapevine base.
6. Adjust and Fluff
- Inspect the wreath for any gaps or uneven areas. Add extra pampas grass, greenery, or filler flowers as needed.
- Fluff the pampas grass to create a full and airy look.
7. Add a Hanging Loop
- If needed, attach a loop of twine to the top of the wreath for easy hanging.
Tips:
Durability: If displaying outdoors, ensure the wreath is in a covered area to protect the macramé and dried elements from weather damage.
Balance the Design: Keep the decorations on one side of the wreath to maintain the boho asymmetrical aesthetic.
Fluff Pampas Grass: Before attaching, fluff the pampas grass by shaking it gently to release loose fibers and make it look fuller.
Farmhouse Asymmetrical Wreath With Burlap Bow

Materials Needed:
- Grapevine wreath base (18–20 inches in diameter)
- Artificial white roses (4–6 pieces)
- Artificial eucalyptus stems (various shades for depth)
- Dried or faux greenery (like seeded eucalyptus, boxwood, or other textural greens)
- Burlap ribbon (3–4 inches wide for the bow and optional hanging loop)
- Floral wire
- Hot glue gun and glue sticks
- Wire cutters
- Twine or black ribbon (optional for hanging)
Step-by-Step Instructions:
1. Prepare the Wreath Base
- Start with a clean grapevine wreath. Its rustic texture is perfect for the farmhouse aesthetic.
- Choose which side of the wreath will feature the greenery and flowers, leaving the other side exposed for balance.
- Use your wire cutters and trim the branches that stick out of your wreath and may scratch your door.
2. Attach the Greenery
- Trim eucalyptus stems to about 8–12 inches in length.
- Begin layering the stems on one side of the wreath, starting at the top and working down the side.
- Secure each stem by tucking it into the grapevine base and securing it with floral wire. Add hot glue for extra hold if needed.
3. Incorporate Textural Greens
- Add additional greenery, such as seeded eucalyptus or boxwood, for texture and fullness.
- Place these stems between the eucalyptus to create depth and visual interest. Secure them with floral wire or hot glue.
4. Add the White Roses
- Trim the stems of the artificial roses to about 2–3 inches.
- Place the roses evenly along the greenery cluster, focusing on the middle and bottom sections for balance.
- Attach the roses securely with hot glue, ensuring they are nestled among the greenery.
5. Create and Attach the Burlap Bow
- Cut a length of burlap ribbon (approximately 24–30 inches) and tie it into a simple bow with long tails.
- Trim the ribbon tails at an angle for a polished look.
- Attach the bow to the top of the greenery cluster using floral wire or hot glue.
6. Add a Hanging Loop
- Attach a loop of burlap ribbon, twine, or black ribbon to the top of the wreath for easy hanging.
7. Final Adjustments
- Inspect the wreath for any gaps or uneven areas. Add extra greenery or small flowers as needed.
- Fluff the bow and adjust the angles of the flowers and greenery to achieve a balanced, natural look.
Tips:
Durability: Use high-quality faux materials to ensure the wreath lasts through multiple seasons.
Farmhouse Vibe: Stick to muted, natural tones and textures to maintain the farmhouse aesthetic.
Customization: Swap the white roses for sunflowers or other blooms to match different seasons.
Colorful Easter Egg Wreath

Materials Needed:
- Wreath base (grapevine or styrofoam, approximately 16–18 inches)
- Artificial grass stems (long and flexible for a natural effect)
- Artificial daisies (white with yellow centers)
- Artificial spring flowers (small yellow, pink, and blue blooms)
- Plastic or foam Easter eggs (assorted pastel colors)
- Floral wire
- Hot glue gun and glue sticks
- Wire cutters
- Twine or ribbon (optional, for hanging)
Step-by-Step Instructions:
1. Prepare the Wreath Base
- Start with a clean wreath base. If using a styrofoam buy a green styrofoam base or wrap it with green floral tape to help blend with the grass stems.
- If using a grapevine vase, use your wire cutters and trim the branches that stick out of your wreath and may scratch your door.
2. Attach the Grass
- Trim the artificial grass stems to 8–10 inches. Insert the stems into the wreath base at an angle, layering them to create a full, lush look.
- Secure the grass stems with floral wire or hot glue as you go, ensuring they are evenly distributed around the wreath.
3. Add the Daisies
- Trim the daisy stems to about 6–8 inches.
- Insert the daisies evenly around the wreath, tucking them into the grass for a natural look. Use hot glue to secure each flower.
4. Incorporate Spring Flowers
- Add small yellow, pink, and blue flowers between the daisies for pops of color.
- Attach the flowers with hot glue or floral wire, ensuring they are spaced evenly.
5. Attach the Easter Eggs
- Use plastic or foam Easter eggs in pastel shades like pink, yellow, green, and blue.
- Apply hot glue to the back of each egg and nestle them into the grass around the wreath. Arrange them evenly for a balanced design.
6. Layer and Adjust
- Continue layering flowers and eggs until the wreath looks full and vibrant. Adjust the placement of grass and flowers to cover any gaps.
7. Add a Hanging Loop
- Attach a loop of twine or ribbon to the top of the wreath for easy hanging.
Tips:
Durability: Use UV-resistant materials if the wreath will be displayed outdoors to prevent fading.
Color Balance: Distribute the colors of the eggs and flowers evenly for a harmonious look.
Customization: Add small embellishments like butterflies or ribbons for a personalized touch.
Pink Peony and Eucalyptus Wreath

Materials Needed:
- Grapevine wreath base (16–18 inches)
- Artificial pink peonies (6–8 large blooms)
- Artificial eucalyptus stems (variety of shades for depth)
- Artificial greenery (like ferns or other soft foliage)
- Wide satin ribbon (in white or light pink, for the bow)
- Floral wire
- Hot glue gun and glue sticks
- Wire cutters
- Twine or ribbon (optional for hanging)
Step-by-Step Instructions:
1. Prepare the Wreath Base
- Start with a grapevine wreath. Its natural texture complements the greenery and flowers.
- Choose a section of the wreath as the focal area for the flowers and bow.
- Use your wire cutters and trim the branches that stick out of your wreath and may scratch your door.
2. Attach the Eucalyptus
- Trim the eucalyptus stems to manageable lengths (about 8–10 inches).
- Insert the stems into the grapevine wreath, layering them to cover the base fully. Secure each stem with floral wire or hot glue.
- Allow the eucalyptus to extend slightly outward for a natural, lush look.
3. Add Additional Greenery
- Layer in other greenery like ferns or softer leaves to add texture.
- Distribute the greenery evenly around the wreath to ensure fullness and depth. Secure with hot glue or floral wire.
4. Place the Pink Peonies
- Trim the stems of the artificial peonies to about 3–4 inches.
- Position the peonies evenly around the wreath, focusing on the bottom half for balance.
- Attach the flowers securely with hot glue, ensuring they are nestled among the greenery.
5. Create and Attach the Bow
- Cut a length of wide satin ribbon (about 24–30 inches) and tie it into a large bow with long tails.
- Adjust the loops of the bow to make them symmetrical and trim the ribbon tails at an angle for a polished look.
- Attach the bow to the top center or slightly off-center of the wreath using floral wire or hot glue.
6. Final Adjustments
- Inspect the wreath for any gaps or uneven areas. Add extra greenery or small floral accents as needed.
- Fluff the flowers and greenery to create a full and natural look.
7. Add a Hanging Loop
- If desired, attach a loop of twine or ribbon to the back of the wreath for easy hanging.
Tips:
Durability: Use UV-resistant materials if the wreath will be displayed outdoors to prevent fading.
Color Palette: Stick to soft pastel tones to maintain the spring aesthetic.
Customization: Swap the peonies for other seasonal flowers like roses or ranunculus.
Nautical Wreath with Seashells

Materials Needed:
- Foam wreath form (10-12 inches in diameter)
- Burlap ribbon (wide, to wrap the wreath)
- Navy blue ribbon (wide, for the stripes)
- Natural jute or sisal rope (for the decorative rope wrapping)
- Seashells and starfish (variety of sizes)
- Hot glue gun and glue sticks
- Scissors
- Twine or nautical rope (for the hanging loop)
- Optional: Clear varnish (to seal natural seashells)
Step-by-Step Instructions:
1. Wrap the Wreath Form with Burlap
- Begin by wrapping the foam wreath form with the burlap ribbon.
- Secure the ends of the ribbon at the back of the wreath with hot glue, ensuring the entire form is covered evenly.
2. Add Navy Blue Stripes
- Wrap the navy blue ribbon around the burlap-covered wreath in evenly spaced intervals to create stripes.
- Secure the ends of the ribbon at the back of the wreath with hot glue.
3. Wrap with Rope
- Take the natural jute or sisal rope and wrap it around one section of the wreath to add texture and reinforce the nautical theme.
- Secure the rope ends with hot glue at the back of the wreath.
4. Attach Seashells and Starfish
- Arrange the seashells and starfish in a cluster on the rope-covered section of the wreath.
- Use hot glue to attach each shell securely to the wreath. Place larger shells first and fill gaps with smaller ones for a cohesive look.
5. Create the Hanging Loop
- Cut a length of twine or nautical rope and tie it into a loop.
- Attach the loop to the top of the wreath at the back using hot glue or by tying it securely.
6. Seal the Design
- If using natural seashells, apply a coat of clear varnish to enhance their shine and protect them from weathering (optional).
Tips:
Durability: Use weather-resistant materials if displaying the wreath outdoors.
Symmetry: Place the rope and seashell cluster on one side of the wreath for an asymmetrical, modern look.
Personalization: Add small embellishments like an anchor charm, a miniature ship wheel, or sand dollars to enhance the nautical theme.
Cheery Daffodil and English Ivy Wreath

Materials Needed:
- Grapevine wreath base (14–16 inches in diameter)
- Artificial or fresh daffodils (yellow blooms with stems)
- Artificial ivy vines (trailing and lush)
- Small white flowers (optional, for filler and contrast)
- Floral wire
- Hot glue gun and glue sticks
- Wire cutters
- Twine or ribbon (optional, for hanging)
Step-by-Step Instructions:
1. Prepare the Grapevine Wreath Base
- Use a natural grapevine wreath base. Its rustic design pairs beautifully with the greenery and flowers.
- Determine the top and bottom of the wreath for an asymmetrical, cascading design.
- Use your wire cutters and trim the branches that stick out of your wreath and may scratch your door.
2. Attach the Ivy
- Cut the ivy into manageable sections, leaving long trailing pieces for a cascading effect.
- Begin attaching the ivy vines to one side of the wreath, allowing them to drape downward. Secure the ivy with floral wire by wrapping it tightly around the vines and the grapevine base.
- Continue adding ivy until the bottom half of the wreath is lush and full.
3. Position the Daffodils
- Trim the stems of the daffodils to about 6–8 inches. Cluster them together on one side of the wreath, ensuring the blooms are angled outward for visibility.
- Secure the daffodil stems with floral wire or hot glue. Layer the blooms slightly to create a natural, gathered appearance.
4. Add White Filler Flowers
- Insert small white flowers between the daffodils and ivy for contrast and softness.
- Secure the white flowers with hot glue or floral wire, spacing them evenly among the daffodils.
5. Create a Cascading Look
- Adjust the ivy vines to ensure they cascade naturally from the bottom of the wreath. Trim or reposition any sections that appear uneven or too heavy.
6. Secure and Finalize
- Inspect the wreath for any loose pieces. Use additional floral wire or hot glue to secure any stems or vines that may shift.
- Fluff and adjust the ivy and daffodils to ensure they look full and balanced.
7. Add a Hanging Loop
- Attach a loop of twine or ribbon to the top of the wreath for easy hanging.
Tips:
Customization: Add small decorative touches like a bird’s nest, butterfly, or bow to enhance the springtime theme.
Fresh vs. Faux: If using fresh daffodils, consider placing them in small water tubes to extend their lifespan.
Durability: Use weather-resistant materials if displaying the wreath outdoors.
Charming Felt Wreath with Bow

Materials Needed:
- Foam wreath form (12–14 inches in diameter)
- Felt sheets in various colors:
- Green (for leaves)
- Pastel shades (for flowers: pink, yellow, purple, etc.)
- Hot glue gun and glue sticks
- Fabric scissors
- Ribbon (for the bow, light blue or a matching pastel color)
- Cardboard or paper (for flower templates)
- Pencil or chalk (for tracing templates)
- Optional: Sewing pins (for temporarily holding pieces)
Step-by-Step Instructions:
1. Prepare the Wreath Base
- Start with a plain foam wreath form.
- If desired, wrap the wreath base with felt or ribbon in a neutral color to give it a clean, uniform background.
2. Make the Leaves
- Cut out leaf shapes from green felt. Each leaf should be approximately 4–6 inches long.
- Use scissors to cut a slight curve or pointed end to mimic natural leaves.
3. Make Rolled Felt Flowers
- Use felt sheets in pastel colors for the flowers.
- For roses:
- Cut a large spiral shape from the felt, starting with a circle (about 6–8 inches in diameter).
- Roll the spiral tightly from the outer edge toward the center.
- Secure the base of the rolled flower with hot glue.
- For daisies:
- Cut a circle (approximately 3–4 inches in diameter) and cut evenly spaced slits toward the center, leaving a small circle intact in the middle.
- Add a small yellow circle in the middle as the daisy center.
- Secure the layers with hot glue.
- For other layered flowers:
- Cut several petal shapes and layer them in a circular fashion.
- Glue each layer together, building up a full flower.
4. Arrange and Attach Flowers
- Arrange the flowers on one side or around the entire wreath, depending on the desired design.
- Tuck the green felt leaves around the flowers for a balanced look.
- Attach each flower and leaf to the wreath base using hot glue.
5. Create and Attach the Bow
- Cut a piece of ribbon (approximately 24–30 inches) and tie it into a bow.
- Trim the ribbon tails at an angle for a polished look.
- Attach the bow to the bottom of the wreath using hot glue or by tying it securely around the wreath base.
6. Fill Gaps
- Inspect the wreath for any gaps and add extra flowers, leaves, or small accents to ensure a full and cohesive design.
7. Add a Hanging Loop
- Attach a loop of ribbon or twine to the back of the wreath for easy hanging.
Tips:
Durability: If displaying outdoors, ensure the wreath is in a covered area to protect it from weather exposure.
Templates: Use paper templates to trace flower and leaf shapes onto the felt for consistent designs.
Customization: Change the color palette to match seasonal themes or décor.
Elegant Muted Wreath with Roses & Lace

Materials Needed:
- Grapevine wreath base (12–14 inches in diameter)
- Artificial roses (in muted tones such as mauve, dusty pink, or beige)
- Small dried flowers and berries (for filler and texture)
- Burlap or lace ribbons (variety of lengths for layering)
- Silk or satin ribbons (in complementary soft tones like dusty rose or cream)
- Vintage-style key (lightweight metal or decorative replica)
- Hot glue gun and glue sticks
- Floral wire
- Wire cutters
- Optional: Small accents (e.g., pearls, beads, or fabric bows)
Step-by-Step Instructions:
1. Prepare the Grapevine Wreath Base
- Start with a grapevine wreath base. Its natural, rustic look enhances the vintage aesthetic.
- Determine the focal area for the flowers and key, leaving part of the wreath exposed for balance.
- Use your wire cutters and trim the branches that stick out of your wreath and may scratch your door.
2. Attach the Roses
- Trim the stems of the artificial roses to about 2–3 inches.
- Cluster the roses on one side of the wreath, focusing on the bottom left quadrant.
- Use hot glue or floral wire to attach the roses securely to the wreath base.
3. Add Dried Flowers and Berries
- Insert small dried flowers and berries around the roses to create texture and fill gaps.
- Secure these elements with hot glue, making sure they blend naturally with the roses.
4. Incorporate Burlap and Lace Ribbons
- Cut lengths of burlap and lace ribbons (about 12–18 inches long).
- Attach the ribbons to the bottom of the wreath, letting them hang loosely for a cascading effect.
- Layer different textures (e.g., burlap and lace) for depth and visual interest.
5. Add Satin Ribbons
- Cut silk or satin ribbons to match the lace lengths and add them to the cascading ribbons.
- Secure the ribbons with hot glue or tie them directly around the grapevine base.
6. Attach the Vintage Key
- Tie the vintage-style key to the center of the cascading ribbons using a small piece of twine or satin ribbon.
- Let the key hang naturally as a focal accent.
7. Add Final Touches
- Inspect the wreath for any gaps or uneven areas. Add small accents like pearls, fabric bows, or more dried flowers as needed.
- Adjust the ribbons and flowers to ensure everything looks balanced and cohesive.
8. Add a Hanging Loop
- Attach a loop of twine or ribbon to the top of the wreath for easy hanging.
Tips:
Durability: Use high-quality faux materials and secure all pieces firmly, especially if displaying the wreath in a high-traffic area.
Aging the Materials: For an authentic vintage look, lightly distress the ribbons or add a tea-stained effect to the lace.
Balance: Keep the flowers and embellishments on one side of the wreath to maintain the asymmetrical design.
Minimalist Dogwood Wreath with Ferns

Materials Needed:
- Grapevine wreath base (12–14 inches)
- Artificial dogwood flowers (white blooms with pink tips)
- Artificial ferns (in light green)
- Pink filler flowers or accents (e.g., dried coral fern or faux heather)
- Artificial eucalyptus stems (dusty green for texture)
- Floral wire
- Hot glue gun and glue sticks
- Wire cutters
- Twine or ribbon (optional, for hanging)
Step-by-Step Instructions:
1. Prepare the Grapevine Wreath Base
- Start with a clean grapevine wreath. Its rustic texture adds to the natural aesthetic of the design.
- Decide on the focal area of the wreath, typically the lower left quadrant, leaving part of the grapevine exposed for balance.
- Use your wire cutters and trim the branches that stick out of your wreath and may scratch your door.
2. Attach the Ferns
- Trim the ferns to manageable lengths (about 8–10 inches).
- Layer the ferns along the left side of the wreath, fanning them out slightly for a natural, cascading look.
- Secure the stems to the wreath base using floral wire. Tuck the stems into the grapevine to hide them.
3. Add the Eucalyptus
- Cut the eucalyptus stems to about 6–8 inches.
- Arrange them slightly overlapping the ferns, creating depth and layering.
- Attach the eucalyptus with hot glue or floral wire, ensuring the greenery flows outward naturally.
4. Position the Dogwood Flowers
- Trim the dogwood flower stems to about 4–6 inches.
- Cluster the flowers in the middle of the greenery arrangement, focusing on the lower left area.
- Attach the flowers securely with hot glue, making sure they sit slightly above the greenery for prominence.
5. Incorporate Pink Accents
- Add small pink filler flowers or accents around the dogwood blooms for a soft, romantic touch.
- Secure the pink accents with hot glue, evenly spacing them throughout the greenery.
6. Adjust and Finalize
- Step back and assess the arrangement. Adjust the placement of the flowers and greenery to ensure a balanced and cohesive design.
- Fill any gaps with additional ferns, eucalyptus, or pink accents as needed.
7. Add a Hanging Loop
- Attach a loop of twine or ribbon to the top of the wreath for easy hanging.
Tips:
Durability: Use high-quality faux materials if displaying outdoors to prevent fading or weather damage.
Natural Look: Let some elements extend slightly beyond the wreath base for a more organic feel.
Custom Colors: Swap out the pink accents for other seasonal colors (e.g., yellow for summer or burgundy for fall).
Farmhouse Wreath with Muted Florals

Materials Needed:
- Grapevine wreath base (12–16 inches in diameter)
- Artificial cream roses (3–4 large blooms)
- Artificial greenery:
- Dusty miller or seeded eucalyptus (for variety)
- Lamb’s ear (for soft texture)
- Small filler flowers (e.g., baby’s breath or dried berries)
- Burlap ribbon (for the bow)
- Floral wire
- Hot glue gun and glue sticks
- Wire cutters
- Optional: Twine or hanging ribbon (for displaying)
Step-by-Step Instructions:
1. Prepare the Grapevine Wreath Base
- Use a natural grapevine wreath base to complement the farmhouse aesthetic.
- Decide on the focal area where the flowers and greenery will be arranged (usually at the bottom center or lower half).
- Use your wire cutters and trim the branches that stick out of your wreath and may scratch your door.
2. Attach the Greenery
- Trim the stems of the greenery to about 6–8 inches.
- Begin layering the lamb’s ear and dusty miller stems on the bottom section of the wreath. Allow the leaves to fan outward for a natural, cascading effect.
- Secure each stem to the grapevine base using floral wire or hot glue.
3. Position the Roses
- Trim the stems of the artificial cream roses to about 3–4 inches.
- Cluster the roses at the center of the greenery arrangement, slightly overlapping the leaves.
- Attach the roses securely to the wreath using hot glue, making sure they are evenly spaced and angled outward for a natural look.
4. Add Filler Flowers
- Insert small filler flowers, like baby’s breath or dried berries, around the roses and greenery for added texture and detail.
- Secure the fillers with hot glue, ensuring they blend seamlessly with the main arrangement.
5. Create and Attach the Burlap Bow
- Cut a piece of burlap ribbon (about 24–30 inches) and tie it into a large bow.
- Trim the ribbon tails at an angle for a clean, finished look.
- Attach the bow to the top center of the wreath or slightly above the floral arrangement using floral wire or hot glue.
6. Secure and Finalize
- Inspect the wreath for any gaps or uneven areas. Add extra greenery or flowers as needed to balance the design.
- Adjust the placement of the elements to ensure everything looks cohesive and visually appealing.
7. Add a Hanging Loop
- Attach a loop of twine or ribbon to the top of the wreath for easy hanging.
Tips:
Durability: Use weather-resistant materials if displaying outdoors, especially in direct sunlight or rain.
Natural Look: Keep the greenery loose and flowing for an organic farmhouse feel.
Customization: Swap the cream roses for seasonal flowers like sunflowers or peonies to create a similar design for different occasions.
Charming Butterfly Wreath Using Cardstock

Materials Needed:
- Grapevine wreath base (12–14 inches in diameter)
- Colored cardstock or craft paper (in various pastel and vibrant colors)
- Butterfly templates (printable or hand-drawn in various sizes)
- Scissors
- Hot glue gun and glue sticks
- Floral wire (optional, for securing butterflies)
- Wire cutters (optional)
- Twine or ribbon (optional, for hanging)
Step-by-Step Instructions:
1. Prepare the Grapevine Wreath Base
- Use a rustic grapevine wreath as the base. The natural, twig-like structure provides a great contrast to the colorful butterflies.
- Shake the wreath gently to remove any loose pieces of vine.
2. Create the Paper Butterflies
- Print or draw butterfly templates in various sizes (e.g., small, medium, and large).
- Trace the templates onto colored cardstock or craft paper in a variety of colors.
- Carefully cut out the butterflies using scissors.
- Fold each butterfly slightly along the centerline to create a 3D effect, giving the wings a lifelike appearance.
3. Arrange the Butterflies
- Lay out the butterflies on the wreath base to determine the arrangement. Space them evenly or cluster them for a dynamic look.
- Position larger butterflies at the bottom and smaller ones near the top for a natural flow.
4. Attach the Butterflies
- Use a hot glue gun to attach the butterflies to the grapevine base. Apply a small amount of glue to the back of the butterfly (near the folded center) and press it onto the wreath.
- For a more secure attachment, you can use floral wire. Pierce the butterfly with the wire at the fold and twist the wire around the wreath branches.
5. Add Movement
- If desired, attach a few butterflies to thin, flexible floral wire. Insert the wire into the grapevine wreath, allowing the butterflies to appear as if they are floating above the base.
6. Secure and Finalize
- Inspect the wreath for any gaps or uneven areas. Adjust the butterfly placement to ensure a balanced design.
- Allow the glue to dry completely.
7. Add a Hanging Loop
- Attach a loop of twine or ribbon to the top of the wreath for easy hanging.
Tips:
Durability: If displaying outdoors, use waterproof or laminated paper to protect the butterflies from moisture.
Customization: Use glitter paper, metallic cardstock, or patterned paper for a more whimsical effect.
Seasonal Variation: Swap the colors to match different seasons (e.g., warm tones for fall or icy shades for winter).
With these 27 DIY spring wreath ideas, you’re all set to brighten your home and embrace the joys of the season. Each project is a perfect blend of creativity, affordability, and style, proving that you don’t need to spend a fortune to craft something beautiful. Whether you opt for a colorful floral arrangement, a whimsical theme, or a minimalist design, these wreaths are sure to make a statement. So grab your crafting supplies, gather your inspiration, and let your front door bloom with a one-of-a-kind creation that welcomes spring in style!