19 Beautiful Cozy Birdhouses For Your Bird Oasis Backyard
If you’re dreaming of an idyllic English cottage garden scene right in your backyard, try transforming a plain birdhouse into a charming work of art. The 19 DIY birdhouse painting ideas below blend cottagecore whimsy and dainty, feminine details – think climbing roses, lavender sprigs, trailing vines, and vintage touches – to create birdhouses that look straight out of a storybook. Each design includes suggested color palettes, painting techniques (dry brushing for rustic charm, stippling for textured florals, decoupage for intricate patterns, etc.), and finishes to ensure your artwork is outdoor-safe.
Tip: Always use non-toxic, outdoor-grade paints and sealers, and only decorate the exterior (leave the interior unpainted for the birds’ safety).
Some of the links in this post are affiliate links, which means I may earn a small commission (at no extra cost to you) if you choose to make a purchase. I only share things I genuinely love or would use in my own cozy home. Thank you for your support and helping me keep the ideas coming! 💛 Affiliate Disclosure
- Rose Garden Cottage Birdhouse
- Lavender Fields Birdhouse
- Wildflower Meadow Birdhouse
- Ivy and Roses Cottage Birdhouse
- Wisteria Wonderland Birdhouse
- Mossy Mushroom Fairy Birdhouse
- Vintage Tea Rose Decoupage Birdhouse
- Shabby Chic Lace Birdhouse
- Forget-Me-Not Cottage Birdhouse
- Morning Glory Trellis Birdhouse
- Hollyhock Haven Birdhouse
- Butterflies and Blooms Birdhouse
- Foxglove Fairy Birdhouse
- Secret Garden Gate Birdhouse
- Peony Paradise Birdhouse
- Thatch Roof Cottage Birdhouse
- Strawberry Patch Birdhouse
- Gingham and Roses Birdhouse
- Daisy Chain Birdhouse

Perfect for vintage rose decoupage or tea garden styles.
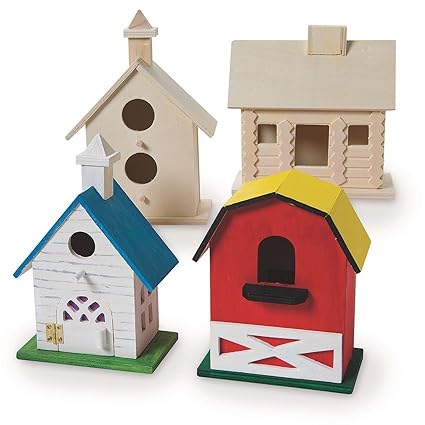
Budget-friendly variety pack for beginners and experts alike.

For rose trellises, climbing ivy, and butterfly silhouettes.

For vines, florals, and lace patterns. Ideal for fine cottagecore motifs.

Essential for protecting your art from UV and rain.

For sealing painted birdhouses or using in your decoupage tutorial.

Great for florals, vines, and soft cottage tones. Look for weather-resistant or multi-surface formulas.
Rose Garden Cottage Birdhouse

Capture the romance of an English rose garden with this soft and feminine design. Perfect for spring, this birdhouse brings climbing roses to life with pink petals and sage-green vines. It’s a lovely way to welcome birds and blooming season alike.
- Paint Colors: Choose a soft pastel base (e.g. blush pink or creamy white) to evoke an English rose garden. You can add white trim or lattice accents to enhance the cottage look.
- Motifs: Using a fine detail brush, paint climbing roses with delicate pink petals and sage-green vines winding around the birdhouse. Cluster the roses around the entry hole and corners for a lush, blooming effect. (For easy roses, you can use a stencil or dot in layers to form petals.) Consider adding a few tiny lavender sprigs as accents since lavender pairs beautifully with roses in cottage gardens.
- Techniques: Use a stippling technique (dabbing with a small stiff brush) to create texture in the rose centers or to add tiny bud clusters. You might also lightly dry-brush a bit of white on edges of the birdhouse to give a sun-kissed, weathered touch for vintage charm.
- Finish: Seal the finished design with a clear matte outdoor polyurethane. A water-based exterior clear coat will protect the paint from UV and rain without yellowing the colors or deterring birds.
Lavender Fields Birdhouse

Bring a soothing cottage feel to your backyard with a lavender-themed birdhouse. This design uses soft purples and delicate stem details to create a calming mini retreat. Ideal for fans of Provence and cottage apothecary gardens.
- Paint Colors: Paint the birdhouse a soft lilac or antique white as a base. This gentle color will complement the purple of the lavender motifs. Consider a pale blue or mint for the roof to mimic sky or foliage tones.
- Motifs: Create the look of a lavender patch blooming along the sides. Paint slender green stems rising from the bottom, topped with clusters of tiny purple lavender buds. Use a small round brush or even the tip of a cotton swab to dot on the lavender buds for a natural, irregular look. Add a few leaf sprigs around them to fill out the “field.”
- Techniques: Employ a stippling or dotting technique for the lavender blooms to get that textured, floral effect without needing fine detail strokesbirdinginsider.com. You could also lightly sponge a bit of pale green and white around the base to resemble grass or a cloudy, dreamy background.
- Finish: Once dry, apply a coat of UV-resistant sealer in matte or satin. This will preserve the soft colors and prevent fading in the summer sun. The matte finish also keeps the look gentle and rustic (avoiding a glossy shine).
Perfect for vintage rose decoupage or tea garden styles.
Budget-friendly variety pack for beginners and experts alike.
For rose trellises, climbing ivy, and butterfly silhouettes.
For vines, florals, and lace patterns. Ideal for fine cottagecore motifs.
Essential for protecting your art from UV and rain.
For sealing painted birdhouses or using in your decoupage tutorial.
Great for florals, vines, and soft cottage tones. Look for weather-resistant or multi-surface formulas.
Wildflower Meadow Birdhouse

Inspired by untamed wildflower fields, this design bursts with color and cheerful blooms. It’s great for anyone who wants their backyard to feel like a summer meadow in full bloom. Playful, eclectic, and vibrant.
- Paint Colors: Use a sky-blue or pale spring green base coat to set a cheerful scene (blue for sky above a meadow, or green as a grassy field backdrop). A muted base ensures the multicolored wildflowers you add will pop.
- Motifs: Paint a variety of tiny wildflowers as if a meadow is wrapping around the birdhouse. Dabble on white daisies with yellow centers, little pink and blue blossoms, and maybe some orange poppies or yellow buttercups. Scatter them at different heights. You can create simple five-petal flowers by dotting the petals in a circle – precision isn’t necessary for a charming wildflower look.
- Techniques: Use the tip of a brush or a series of small dots to form flower clusters with minimal detailbirdinginsider.com. A small sponge can be used to gently blend shades of green for a mottled, natural ground or foliage background before adding the flower dots. Layer the colors: for example, stipple darker green at the bottom for grass, then add brighter floral dots on top.
- Finish: Protect this colorful scene with an outdoor acrylic varnish (matte). The varnish will keep the myriad of colors from chipping or washing out. With a good sealant, your painted wildflowers will stay vibrant through spring and summer showers.
Ivy and Roses Cottage Birdhouse

This classic combination of ivy vines and pink roses feels straight out of a storybook cottage. It adds an old-world elegance and climbing garden effect to any outdoor space. Ideal for year-round display.
- Paint Colors: Start with a cottage-cream or pale butter yellow base to resemble old cottage walls warmed by the sun. For contrast, the roof can be a darker brown or grey, like weathered wood or stone.
- Motifs: Paint trailing English ivy vines meandering up the walls of the birdhouse. Use a slender brush to create twisting vine lines in a medium green tone. Add ivy leaves along the vines by dabbing a small angled brush – dark green for shadowed leaves, lighter green for sunlit ones. Intermix small pink rose blooms among the ivy (as if a rose bush is entwined) for a romantic touch. Cluster a few roses together to form little bouquets on the vine.
- Techniques: For the ivy leaves, you can use a simple stipple or tear-drop stroke. Overlay a few layers of green to give dimension to the foliage. The roses can be painted with a quick comma stroke technique for petals or by layering a darker pink dot with a lighter pink swirl on top to suggest petals. Don’t worry about perfection – a slightly impressionistic approach actually looks quaint on a cottage birdhouse.
- Finish: Use a satin exterior sealer to give a slight sheen that accentuates the depth of the greens and pinks. The sealer will also ensure the ivy and rose design stays fresh against rain. A quality clear coat also prevents the colors from peeling under the sun.
Wisteria Wonderland Birdhouse

Channel the charm of an old English arbor with this draping wisteria design. The cascading purples and leafy vines give a dreamy, romantic feel. A perfect addition to pergolas or shaded garden corners.
- Paint Colors: Choose a warm white or very light beige for the birdhouse body – this makes a nice backdrop for purple wisteria blossoms. The roof can be painted a soft gray or taupe, reminiscent of weathered cottage shingles or stone.
- Motifs: Create cascading wisteria vines draping from the roofline. Starting at the eaves, paint thin twisting branches or vines in brown or green. From these, have clusters of wisteria hanging down: use a lavender or violet-purple color to paint elongated grape-like clusters of petals. Each wisteria cluster can be made by dotting or stroking small ovals in groups, denser at the top and tapering toward the bottom. Add a few pale green leaves near the vine origins for contrast.
- Techniques: A stippling or dabbing motion works great for wisteria blooms – you can use a round brush and gently tap to form the clustered petals. To give a realistic touch, mix two shades of purple (a deeper one and a lilac) and layer them, creating depth in the hanging flowers. You might also dry-brush a bit of light gray or tan on the white walls beforehand, to mimic an aged plaster wall before adding the vibrant wisteria.
- Finish: Coat the birdhouse with a UV-protective acrylic sealer (matte or satin). This will preserve the delicate purples from fading. A satin finish can subtly enhance the illusion of nectar-rich blossoms catching the light, while still protecting the wood from moisture.
Mossy Mushroom Fairy Birdhouse

Perfect for woodland lovers and fairy garden fans, this enchanted birdhouse features mossy textures and whimsical mushrooms. It blends beautifully with shaded gardens and forest-like spaces. Magical and earthy.
- Paint Colors: Begin with an earthy base color like sage green or pale moss for the house, and perhaps a darker brown or forest green for the roof. These organic colors set a woodland tone, perfect for a fairy cottagecore vibe.
- Motifs: Along the base and sides, paint patches of faux moss and a few cute mushrooms. For the moss, use a sponge to dab on mixed greens (olive, moss, and a bit of yellow-green) in an irregular, patchy way – it should look like it’s naturally growing on the birdhouse. Then, paint mushrooms popping up from the bottom edge: a classic toadstool style with red caps and white spots, and maybe some with beige or brown caps for variety. Cluster some small mushrooms together for a natural look. You can also add tiny white flowers or toadstool dots around to enhance the enchanted forest feel.
- Techniques: Use stippling to create a textured look for the mossy areas – layering dark and light greens until it looks fuzzy. For the mushrooms, outline the cap shape first, fill with color, and add white dots once the red base dries. A small liner brush can draw thin white mushroom stems. To add depth, you might dry-brush a darker green in the center of moss patches and a lighter green at the edges, creating a shadowed effect.
- Finish: Once everything is dry, use a clear outdoor polyurethane (water-based) to seal. Matte is likely best here to maintain the natural, earthy look (moss looks more realistic when not shiny). This topcoat will protect your painted “moss” and mushrooms from real moss and weather, keeping the fairy-tale birdhouse looking magical year-round.
Vintage Tea Rose Decoupage Birdhouse

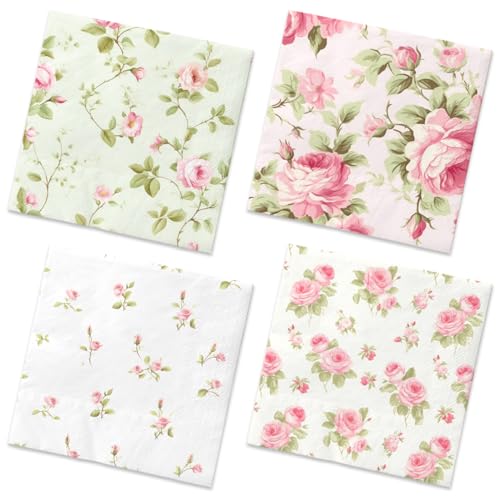
Vintage elegance meets cottage charm in this decoupage design. Use floral paper cutouts to create an aged tea rose aesthetic that feels straight from grandma’s china cabinet. It’s a dainty, effortless way to decorate.
- Paint Colors: Paint the birdhouse in an antique white, pale ivory, or even a soft tea green base – something that gives a vintage, aged backdrop. Pastel mint or light beige could also work as a base, mimicking old wallpaper or fine china.
- Motifs: Instead of fully hand-painting, use decoupage to apply elegant tea rose patterns. Find floral scrapbook paper or paper napkins with rose prints (think Victorian rose illustrations or Cath Kidston-style patterns). Cut out clusters of roses and leaves. Apply them onto the birdhouse with decoupage glue so they appear hand-painted. Focus on placing larger rose images on the bigger sides, and smaller rosebuds on narrower areas. You can also decoupage snippets of vintage script or sheet music in the background for extra cottagecore flair.
- Techniques: Use Outdoor Mod Podge (or similar outdoor decoupage glue) to adhere and seal the paper cutouts onto the painted birdhousevaessen-creative.com. Smooth out any wrinkles carefully (a foam brush helps). Once dry, gently dry-brush the edges with a tiny bit of diluted beige or brown paint to blend the paper edges into the background and give an aged, worn effect. This will make the decoupaged roses look like part of the birdhouse, as if aged into the paint.
- Finish: After decoupaging and letting it dry thoroughly, coat the entire birdhouse with additional layers of Outdoor Mod Podge or a clear exterior varnish. Outdoor Mod Podge is water-resistant, but for long-term durability you might add a final layer of spar urethane or clear acrylic sealervaessen-creative.comvaessen-creative.com. Aim for a satin finish (since vintage china often has a soft sheen). This protects the paper and prevents peeling or fading of your lovely rose designs outside.
Shabby Chic Lace Birdhouse

If you love all things soft and weathered, this faux lace and rosebud birdhouse brings shabby chic to the outdoors. It pairs well with whitewashed furniture and vintage florals in any garden nook. Feminine and delicate.
- Paint Colors: Give the birdhouse a base coat of antique white or pastel blush pink. For a true shabby chic look, you can first paint a base color (like pale aqua or pink) then a top coat of white and lightly sand through in spots to let the color show – but a simple single color base works too. The key is a subdued, vintage palette.
- Motifs: Create a faux lace look and add tiny florals for a feminine touch. One way: take a piece of actual lace or a paper doily, lay it against the birdhouse side, and lightly sponge or spray paint over it with a contrasting pastel (for example, white lace pattern over a pink wall, or vice versa). When you remove the lace, it leaves a lovely lacework pattern on the wood. Do this on the roof or the sides as an accent. Then paint a few small rosebuds or daisy clusters scattered around, almost like a floral lace appliqué. Keep these flowers small and in soft colors (baby pink, lilac, butter yellow) to maintain the dainty theme.
- Techniques: Dry brushing is great here – after your base coat, dry-brush a bit of a slightly lighter or darker tone to give a worn, weathered patina, especially on edges and corners (for example, if base is white, dry-brush some pale beige to antique it). If using a lace stencil or actual lace, make sure to use very little paint on your brush or sponge to avoid bleed-under; multiple light passes work better to keep the pattern crisp. You can also distress the edges with fine sandpaper to enhance the shabby chic vibe.
- Finish: Use a matte or satin exterior sealer to protect the design. Matte will keep the chalky, vintage look (chalk paint is often matte), while satin will give just a hint of sheen without looking modern. Ensure you cover the delicate lace-patterned sections thoroughly so that moisture won’t seep under any faux-lace design. Your birdhouse will now look like a cherished cottage heirloom that’s stood the test of time, but is safely sealed for the outdoors.
Forget-Me-Not Cottage Birdhouse

Small, sweet, and sentimental, this birdhouse honors the delicate blue forget-me-not flower. It’s a symbol of memory and love – perfect for a reflective garden corner or a
- Paint Colors: Coat your birdhouse in a robin’s egg blue or a pale sky blue. This color is both cottagey and will echo the tiny blue blossoms of forget-me-nots. For contrast, you might paint the roof or trim in a cream or buttery yellow (yellow and blue make a lovely cottage combination and the yellow will tie in with the flower centers).
- Motifs: Paint clusters of forget-me-not flowers across the birdhouse, especially around the entry hole and edges. These flowers are small, with five petals each. Use a dotting tool or the tip of a small brush to make 4–5 small light-blue dots in a circle for petals, leaving a tiny gap in the middle. Once the blue petal dots dry, add a tiny yellow dot at each center. Arrange the flowers in little bunches connected by thin green stems and accented with a few small leaves. Perhaps have them trailing in a gentle vine-like way or sprinkled as if they naturally grew there.
- Techniques: Keep your brush barely loaded with paint for the tiny petals to maintain their dainty shape (too much paint might blob). You can practice a few on paper first. For a touch of depth, you can vary the blue shades – mix a slightly darker blue and dot it near one side of each flower to imply shade, with lighter blue or white on the opposite side for highlight. This is optional detail since the flowers are tiny. A very light dry brush of white on the blue background (before you paint flowers) can give a subtle weathered effect like a hazy summer sky.
- Finish: After letting the delicate florals set, cover the birdhouse with a clear outdoor acrylic sealer. Matte finish works well to maintain the soft, subtle beauty of the forget-me-nots. This will protect those tiny painted petals from wearing off in rain. The result is a sweet, nostalgic birdhouse that feels like a spring day.
Perfect for vintage rose decoupage or tea garden styles.
Budget-friendly variety pack for beginners and experts alike.
For rose trellises, climbing ivy, and butterfly silhouettes.
For vines, florals, and lace patterns. Ideal for fine cottagecore motifs.
Essential for protecting your art from UV and rain.
For sealing painted birdhouses or using in your decoupage tutorial.
Great for florals, vines, and soft cottage tones. Look for weather-resistant or multi-surface formulas.
Morning Glory Trellis Birdhouse

Paint a cheerful garden trellis winding with morning glory blooms on this birdhouse. It evokes the magic of early summer mornings and fresh-start feelings. Charming, bright, and full of energy.
- Paint Colors: Paint the birdhouse a gentle morning-sky blue or a pale lavender as the base. This will complement the typically purple or blue trumpet-shaped flowers of morning glories. The roof or accent trims can be painted white or light beige.
- Motifs: Create a cottage garden trellis laden with morning glories on your birdhouse. On the sides of the house, paint a simple trellis pattern: use a ruler or tape to help paint a crisscross lattice in white or light brown (like wood). It can be just a few intersecting lines – it doesn’t have to cover the whole side. Then paint twisting vines climbing that trellis. Add heart-shaped green leaves and the signature morning glory blooms. Morning glories often come in shades of purple, blue, pink, or white. You can do a mix – for example, violet purple and periwinkle blue blooms for variety. Make the flowers large enough to be distinctive: a five-pointed star shape in the center is a hallmark of morning glories (you can paint a white star or yellow center in the middle of each).
- Techniques: For crisp trellis lines, painter’s tape is helpful: lay tape in a diagonal grid, paint your chosen color, and peel it off to reveal neat lines. For the flowers, outline a star shape lightly, then paint the petal shapes around it. Alternatively, paint a solid bloom and then add a star-shaped highlight in a lighter color on top. Blend a bit of pink or white at the throat of the bloom to give it depth. Use a curling stroke for the vines so they look naturally winding.
- Finish: Once your charming trellis and flowers are complete, protect the birdhouse with a UV-resistant clear coat. Satin finish might be nice for this one, as it can mimic the dewy morning sheen on flower petals. The protective coat ensures your white trellis stays bright and the colorful blooms don’t fade.
Hollyhock Haven Birdhouse

Bring the towering beauty of hollyhocks into miniature form. These floral spires are a signature of cottage gardens and offer height and movement in your painted design. Bold yet graceful.
- Paint Colors: Use a soft pastel base such as a dusty blue or pale mint green to make a gentle backdrop that will allow pink hollyhocks to stand out. Alternatively, a light gray or off-white base would also work, reminiscent of a cottage wall. The roof could be kept natural wood or painted a complementary green to evoke garden foliage.
- Motifs: Hollyhocks are tall, charming cottage garden flowers that bloom in stacks of blossoms on a stem. Paint a few hollyhock stalks starting from the bottom of the birdhouse sides and reaching upward. Give them rich green stems and leaves at the base. For the blooms, you can choose classic hollyhock colors like soft pink, peach, or even white. Dot or brush on a series of round or slightly scalloped-edged shapes up the stem for the flowers (they can overlap a bit). Add yellow or maroon little centers on each bloom. You might paint one stalk on each side of the birdhouse, or a couple together on a larger side, to frame the birdhouse nicely. Fill any gaps with a few smaller flowers or buds so the design looks abundant.
- Techniques: To get the look of layered petals, paint a circle for the hollyhock bloom, then add a second layer of the same color on half of it to imply depth. A tiny stroke of white in one corner of a bloom can make it look like sunlight is hitting that petal. Use a fine brush to add little dots or short strokes in the centers (yellow or a deeper shade of the petal color) to suggest stamens. If you want a very rustic look, you could initially dry-brush some light brown on the base color to mimic an aged fence or wall for the hollyhocks to grow against.
- Finish: After the design dries, use an exterior varnish (matte or satin) to seal it. This not only preserves your painted hollyhocks but also gives a slight “wet” look to the colors that can enhance their vibrancy in sunlight. The tall flower design will now hold up against real summer heat and rain, inviting birds to a mini garden of their own.
Butterflies and Blooms Birdhouse

Celebrate spring’s beauty with butterflies and blooming florals. This lively design combines fluttering wings with soft petals, creating an uplifting focal point. Sweet and spirited.
- Paint Colors: Opt for a light, cheerful base color such as a pale butter yellow or mint green. These colors say “spring garden” and will allow both flowers and butterfly motifs to show clearly. The roof could be a light sky blue or simply white, to keep the overall palette soft and sunny.
- Motifs: Adorn the birdhouse with a mix of cottage garden blooms (roses, daisies, lavender sprigs – any favorites) and a few pretty butterflies as if they’ve been attracted to the nectar. For the flowers, you might paint a small rose vine on one side, a cluster of daisies on another, and maybe sprigs of lavender or baby’s breath to fill in. Then add butterflies: perhaps a classic monarch (orange and black) or pale yellow and white butterflies for a subtler look. Paint the butterflies with wings open, as if resting on the birdhouse, or a side view as if fluttering. Place one near a flower like it’s about to land.
- Techniques: Use fine brushes for the butterfly details. One trick: paint the basic wing shape and let it dry, then use a fine-tipped marker or paint pen to add the delicate vein or dot details on the wings if freehand painting tiny details is tricky. For the flowers, you can use whichever technique fits each type (roses with layered strokes, daisies with flicked petals, etc.). Compose the scene so it looks balanced – maybe a butterfly on the front and one on a side, with flowers distributed around them.
- Finish: Seal the design with a clear outdoor sealer in a satin finish. The satin will give a gentle glow as if the scene is lit by morning sun. It also helps bring out the colors of the butterflies. The protective coat will keep both the intricate butterfly patterns and the soft floral colors safe from the elements, so your birdhouse stays lively and inviting.
Foxglove Fairy Birdhouse

With bell-shaped foxgloves and hints of fairy garden magic, this birdhouse is a portal to woodland fantasy. Ideal for tucked-away shady spots, it’s enchanting and whimsical.
- Paint Colors: Give the birdhouse a whimsical base color, like a pale mushroom gray or a soft lilac, which complements the pink-purple hues of foxglove flowers. You might do the roof in a slightly darker gray or brown to suggest a cottage in the woods vibe.
- Motifs: Foxgloves are tall spikes of bell-shaped flowers that are very fairy-tale-esque. Paint one or two foxglove spires along the sides of the birdhouse. Each foxglove flower is like a little bell or glove (hence the name) hanging from the stem. Use a purplish-pink for the petals – you can vary from light pink to lavender for interest. Dot the throats of the bells with a bit of white and burgundy speckles (foxglove interiors often have speckling). Around the foxgloves, you could add a few other woodland touches: maybe a tiny painted fairy door at the base, a few toadstools (if you didn’t in #6, or even if you did, it ties the fairy theme), or a subtle silhouette of a fairy or hummingbird near the flowers. Keep the additions small so the tall foxgloves remain the focal point.
- Techniques: For the foxglove blooms, paint the stem line first in green. Then add sequential bell shapes: make a U-shape or bell outline and fill it, each overlapping slightly down the stem. Add a second coat on one side of each bell with a lighter or darker shade to give dimension. Use a tiny brush or toothpick to add dot details inside the bell (you can even just do a couple of dark dots to hint at the pattern). If adding a fairy door, you can outline a small arched doorway at the base in brown and add tiny hinges or a knob for charm. A hint of glitter paint on the fairy elements or flowers could add a magical sparkle if desired.
- Finish: Protect your fantastical creation with an outdoor-proof sealer. If you added glitter, make sure to use a sealer (like a spray or gentle brush-on) that won’t dull the sparkle. A matte finish will make the fairy cottage look more like it’s part of nature, but a slight satin sheen could also work to give a mystical glow. In any case, sealing is important to keep those fine details (and any glitter) intact outside. Now you have a birdhouse that looks plucked from a fairy woodland, ready to enchant both birds and onlookers.


Secret Garden Gate Birdhouse

This design features a hand-painted gate to an imagined secret garden, arched with climbing roses. It’s romantic, mysterious, and storytelling at its best. A functional piece of art.
- Paint Colors: Use a subdued garden hue for the base, such as a soft sage green or stone gray, to resemble old garden walls or gate doors. This will make your painted gate and flowers stand out while keeping an earthy backdrop. The roof can be brown or olive green, as if it’s covered in wooden shingles or vines.
- Motifs: Turn one side of the birdhouse into a little “secret garden” entrance. Paint an arched wooden gate or door, perhaps on the front face of the birdhouse (if there’s space around the entry hole) or on one of the larger sides if the front is taken by the real bird hole. The door can be a rustic brown with black hinges and a little keyhole or handle. Surround this gate with an arch of blooming roses, ivy, and perhaps a hint of a brick or stone wall. Paint stone texture around the door by mottling grays and browns if you like, to suggest the gate is set in a wall. The roses climbing over the arch should be abundant – pick a vibrant color like rosy pink or red to pop against the sage background. Add lush green leaves and maybe a few other flowers peeking through as if there’s a whole secret garden behind the door.
- Techniques: Sketch the outline of the door first with chalk or pencil. Paint the door in sections (planks or panels) to give it realism, adding a darker brown for wood grain or panel lines. Tiny details like a dot of gold or black for a knob, and strap-hinge shapes on the sides, will make it look like a real gate. For the rose arch, use the same techniques as earlier rose motifs: clusters of circular strokes or rosettes for blooms, with vines connecting. If doing bricks or stones, sponge lightly with two shades of gray for a rough stone look, leaving some base color peeking as “mortar.” The key is to create the illusion that this birdhouse holds an entrance to a hidden garden.
- Finish: Once your mini portal to a secret garden is complete, seal the birdhouse with a durable outdoor varnish. Satin or matte would work; satin might make the door look a bit more varnished like real wood, but matte will keep the whole thing looking aged and mysterious. This will protect all the detailed artwork – especially the door which likely has thicker paint – from chipping. The end result is a conversation piece: a birdhouse that invites imagination about what’s behind that tiny gate.
Peony Paradise Birdhouse

Showcase the lush beauty of peonies with this full-bloom design. Layered petals and rich color make it a showstopper for midsummer decor. Luxurious and feminine.
- Paint Colors: Paint the birdhouse with a base of soft mint green or pale blush pink. Either will complement peonies, which often have pink, coral, or white blooms. Another option is a pale dove gray background which can make pink peonies really stand out in an elegant way. Choose a contrasting color for the roof like a white or a slightly darker shade of the base to frame the top.
- Motifs: Peonies are lush, ruffled blooms that scream cottagecore romance. Paint a few large peony flowers on the birdhouse faces, as if the birdhouse itself is part of a flourishing peony bush. You might do one big peony on each side or cluster a couple together on one side and a single on the other for balance. Use shades of pink: perhaps one bloom in soft blush, another in a deeper rose-pink. Start with a general round shape for each peony. Add layered petal strokes – petals are big and overlapping. Include touches of creamy white or deeper pink in the petal layers for depth. Yellow stamens in the center (just little flicks or dots of yellow) will make it instantly recognizable as a peony. Surround the blooms with the rich green foliage peonies have – broad, lobed leaves. You can also add a few tight buds (spheres of green or pink) to indicate more peonies about to bloom.
- Techniques: It might help to lightly sketch circles where you want the peonies first. When painting the petals, use a filbert brush or one with a rounded tip to make broad strokes. Work from the outside of the flower inwards: paint the outer petals first, let dry a bit, then layer inner petals over them. Peonies have a slightly chaotic petal arrangement, so you can be loose – just make sure to layer so it looks filled out. Use both a lighter and darker shade of the main color to create highlights and shadows among the petals (this gives that lush, folded look). For leaves, outline a basic leaf shape and add a center vein line; you can be somewhat impressionistic with these as well.
- Finish: Given the thickly painted petals, use a clearcoat that will go over smoothly – a spray clear enamel might work well to avoid dragging a brush over your art. Otherwise, a careful brushing of polyurethane is fine. A UV-protective finish is important, as pinks can fade; the sealer will keep your peonies vibrant. A subtle satin sheen can mimic the velvety petals and make the colors rich. Now your birdhouse bursts with the beauty of summer peonies, a real centerpiece for your garden decor.
Thatch Roof Cottage Birdhouse
Turn your birdhouse into a storybook thatched-roof cottage, complete with painted windows and a garden vine. It’s cozy, nostalgic, and totally cottagecore.
- Paint Colors: This idea turns your birdhouse into a mini English cottage. Start by painting the walls of the birdhouse a classic cottage white or cream. For an extra touch, you could paint the lower part a slightly different tone (like a pale gray or tan) to mimic a stone foundation. The roof, which will be “thatch,” should be based with a golden-tan or straw yellow color.
- Motifs: Add details to transform the birdhouse into a cozy cottage home. Paint a cute door on the front (if space allows beside or below the bird hole) – maybe a blue or green door for charm – and little windows on the sides. Give the windows tiny grids and maybe flower window boxes under them with little dabs of color for flowers. Now for the roof: to simulate thatch, you will add texture with paint (see technique below). You can also paint the edges of the roof darker to look like the thickness of thatch. Consider painting a vine of roses or ivy climbing one side of the house to blend it into the garden (as many real cottages have). A few terracotta-colored paint dabs at the base could look like flower pots. Essentially, think of a storybook cottage and add those touches in paint.
- Techniques: For the thatched roof effect, use a dry brushing techniqueplaidonline.com. Load a stiff brush with a bit of a darker tan or light brown paint, then wipe most off on a paper towel. Lightly drag the brush in downward strokes on the roof. This creates streaks that resemble layered straw. Do this with a couple of shades (a slightly darker brown and a slightly lighter cream) to give the roof dimension. It will look like straw or grasses layered upplaidonline.com. For the door and windows, use fine brushes; you can outline them in slightly darker shades to create the illusion of depth (e.g., a thin gray outline inside a white window frame to look like window pane shadows). The climbing rose technique was covered earlier – feel free to use that on the cottage wall for extra charm.
- Finish: Once your little cottage is complete, seal the entire birdhouse with a high-quality exterior polyurethane. This is especially important over the roof since the textured dry-brush paint lines could wear off if not sealed. A satin finish is great here: it will give the “plaster” walls a slight sheen like painted stucco, and the thatch will be protected without being shiny. Thanks to the protective coat, your birdhouse cottage will weather the outdoors as well as a real cottage would, remaining ready for its bird residents.
Strawberry Patch Birdhouse

This juicy, berry-filled design is as sweet as a summer snack. Bright red strawberries and soft green leaves give it a playful, cheerful charm. Great for June and July gardens.
- Paint Colors: Paint the birdhouse a warm ivory or a pale spring green to start. Both make a nice neutral garden backdrop that will allow the red strawberries to really pop. You could also do a two-tone: for example, a white body and green roof, or vice versa, to bring in that garden color scheme.
- Motifs: Nothing says sweet cottage garden like wild strawberries peeking out. Paint crawling strawberry vines across the birdhouse. Use a fresh green for the vines and leaves. Strawberry leaves are usually trifoliate (three-part leaves) with serrated edges – you can simplify by painting clusters of three round-edged leaves. Now add the strawberries: cute red heart-shaped or round berries hanging from the vines. Give them tiny white or yellow seeds (just little dot highlights). Include the small five-petaled white strawberry flowers with yellow centers among the vines as well, since those add a lovely delicate touch. Maybe have a cluster of berries and flowers near the bottom and a few trailing upwards. It would be charming to have a berry or two right above the entrance hole as if a bird could take a bite!
- Techniques: If freehand vines are tricky, lightly sketch them first or use a very fine brush to draw curvy lines. Vary the thickness a bit to make them look natural. For uniform tiny seeds on the berries, you can use a toothpick or the tip of a small needle tool to dot them on in a lighter color over the red (a muted yellow or off-white works well; pure white might be too stark). For the flowers, dot a yellow center, then add five white petals around (they can touch the center dot). It might help to use a small dotting tool for petal shape too, or just a small brush with a steady hand. Layer a second coat on the red berries after the first dries to make them vivid, then add a tiny dab of darker red on one side for shading (optional but adds depth).
- Finish: Strawberries and leaves have bold colors, so protect them with a UV-resistant clear coat to prevent fading. A glossy or semi-gloss sealer could be interesting here since it would make the strawberries look a bit shiny (like real berries). However, if you prefer the overall birdhouse to keep a rustic look, go with satin. Either way, ensure every bit of vine and berry is sealed against rain. This delightful birdhouse will look like a piece of a strawberry patch, enticing not just birds but everyone who sees it.
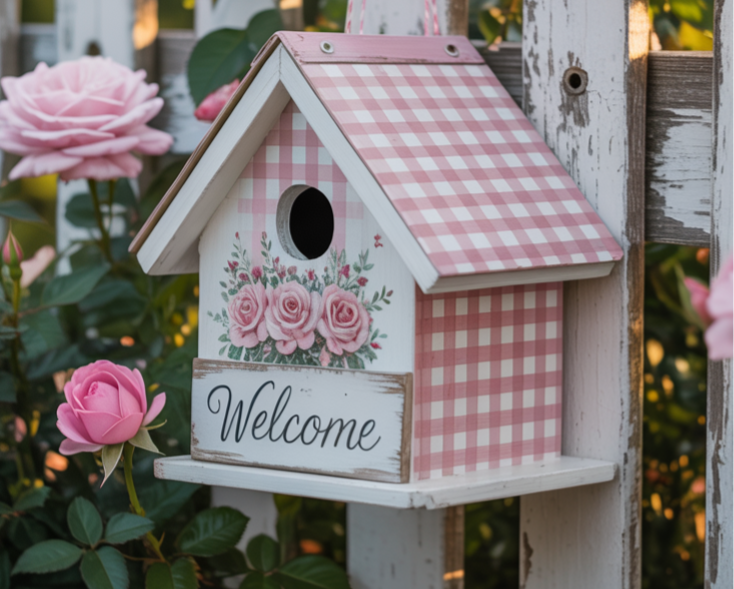
Gingham and Roses Birdhouse

Farmhouse meets floral with this gingham-patterned birdhouse topped in dainty rose bouquets. The checkered background makes it stand out with cozy, classic charm.
- Paint Colors: Embrace a country cottage feel with this pattern-rich design. Pick two main colors for a gingham pattern – for example, soft pink and white (for a very feminine cottage look), or robin’s egg blue and white (a classic country combo). Paint the entire birdhouse with two coats of the lighter color (white, in these examples) as your base so the gingham will have a crisp foundation.
- Motifs: Gingham first, then roses on top. To create the gingham (checkered) pattern: use thin painter’s tape to mask off evenly spaced stripes vertically on the birdhouse, and paint your second color (pink or blue) in those stripes. Once dry, remove tape and then mask off horizontal stripes and paint again. When you remove all tape, you’ll have a charming check pattern of white and color, with slightly darker double-painted squares where the stripes overlapped (that mimics true gingham fabric where the threads cross). Now add roses: paint small clusters of roses and rosebuds on the gingham as if it’s a printed floral fabric. Concentrate them on larger areas like the sides or the roof. Use a contrasting color for the roses – red or bright pink roses on a blue gingham, or deeper pink on a white/pink gingham so they stand out. Add green leaves around them. Space the clusters in a pleasing way (like one on each side panel, maybe a small one on the front above the hole, etc.), but let some of that pretty checkered pattern show through too.
- Techniques: For neat gingham, the taping method described is easiest. Alternatively, you could draw lines and hand-paint them, but tape ensures straight lines. If you don’t have tape that thin, you can use wider tape and paint one stripe at a time carefully. For the rose clusters, you can use the classic swirl technique: start with a messy circle of dark pink, then while wet, swirl in a lighter pink or white with a small brush to make it look like folded petals. Add a couple of green teardrop-shaped leaves per rose. Rosebuds can be just a dot with a tiny flick of green on top. Try to group 2–3 roses together for impact, like a little bouquet.
- Finish: Once everything is dry, apply a clear outdoor sealer. Since this design has a lot of light colors (white and pastels), definitely use a non-yellowing formula (water-based polyurethane) to keep it looking freshhometalk.com. A matte finish will make it look like soft fabric, whereas a satin will give a slight sheen as if the birdhouse is gift-wrapped in patterned paper. Either choice will protect your painstaking gingham lines and pretty roses. The finished birdhouse has a delightful mix of farmhouse and cottagecore – it’s both homey and oh-so-pretty.
Daisy Chain Birdhouse

A garland of daisies wraps this birdhouse in sunshine and joy. It’s light, simple, and perfect for ushering in warm days and blue skies. Wholesome and bright.
- Paint Colors: Coat the birdhouse in a gentle spring hue like pale buttercup yellow or a light sky blue. Both colors provide a nice contrast for white daisy petals and give off a happy summer vibe. You might leave the roof white or paint it a soft green to resemble grass, tying in the theme.
- Motifs: Paint a garland of daisies winding around the birdhouse, like a daisy chain wrapping it. Start at one point (perhaps just below the birdhole), and have a vine or green stem trail around the birdhouse, looping and curving. Along this vine, add dozens of daisy blooms. For each daisy, paint a small yellow circle for the center, then add white petals all around. The petals can be just simple strokes outward from the center. Have the chain loop maybe around the bottom and side of the house, and even continue onto the roof if you want, as if someone draped a daisy lei over it. You can also add a few stand-alone daisies or shorter chains to balance the design on each face of the birdhouse. Throw in a few little leaves here and there on the vine for extra greenery.
- Techniques: For symmetrical daisy petals, one trick is to paint a “compass”: top, bottom, left, right petal first (to anchor the shape), then fill petals in between. But daisies need not be perfectly even – a bit of randomness looks natural. You can double-load a brush with white and a tiny touch of pale pink to get a slight variation on some petal strokes (some cottage daisies or related wildflowers have a pink tint). The vine can be painted with a slender liner brush in one continuous stroke if you’re confident, or in segments. Let it wander casually. Overlap some flowers on top of the vine line and some behind (just paint the vine through and then paint flower over it or vice versa) for a woven look.
- Finish: Apply an outdoor sealing coat to finalize your design. Because white can get dirty or yellowish outdoors, a good clear sealer will help keep those daisies bright (and again, ensure it’s non-yellowing formula). Matte or satin is fine; matte might simulate the soft look of real petals. With the protective finish on, your chain of daisies will stay intact through sunshine and rain, symbolizing the everlasting summer charm of cottage gardens.
Each of these painted birdhouses is more than just a place for birds – it’s a small piece of art that brings your personal cottage garden dreams to life. Whether you’re inspired by climbing roses, whimsical mushrooms, or vintage floral prints, these ideas are a sweet way to slow down, be creative, and beautify your backyard. Pair a few with a cup of tea and an afternoon of painting, and you’ve got the makings of your own enchanted garden retreat.